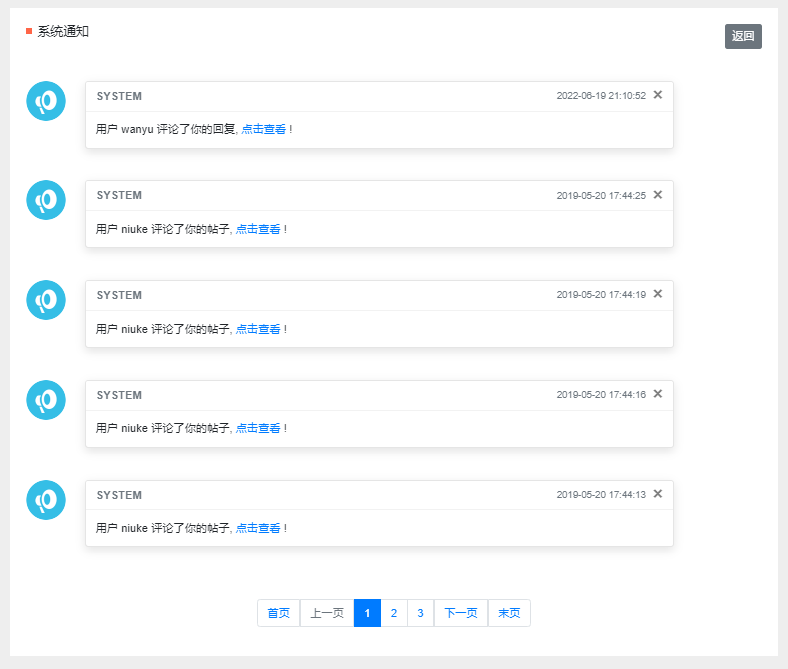
整个Web工程运行的时候碰到奇奇怪怪的问题,先用Maven的clean执行一下
工程端口改为8082,忽略文档里之前写的8080
测试账号和密码:
账号
密码
wanyu
123
niuke
123
lihonghe
123
一、SpringBoot入门:开发社区首页 1. 搭建开发环境 不详细说明,前置课程自行搜索
2. 创建SpringBoot工程 导入的包有:Spring web / Thymeleaf / Spring Boot DevTools / MySQL / MyBatis Framework
配置文件 application.properties
1 2 3 4 5 6 server.port =8080 server.servlet.context-path =/community spring.thymeleaf.cache =false
3. 创建数据库 sql文件:仿牛客论坛\所有素材和源码\第一章素材和源码\素材\community-init-sql-1.5
创建新的数据库命名为community
SQLyog-工具-执行sql脚本-按下面的顺序依次执行3个文件
init_schema.sql –> 建表sql
init_data.sql –> 初始化数据库数据SQL
tables_mysql_innodb.sql –> quarter定时任务表SQL(这步前几章暂时用不到)
或者在MySQL服务端窗口执行source命令,后面加上文件路径,在1.23MyBatis入门视频的11分钟左右有介绍
4. 使用Mybatis 对于Mybatis,建议注解和xml方式都要掌握,不要抗拒使用xml方式,很多公司的老代码都是XML的
首先是数据源和Mybatis的相关配置
1 2 3 4 5 6 7 8 9 10 11 12 13 14 15 16 17 18 spring.datasource.driver-class-name =com.mysql.cj.jdbc.Driver spring.datasource.url =jdbc:mysql://localhost:3306/community?characterEncoding=utf-8&useSSL=false&serverTimezone=Hongkong spring.datasource.username =root spring.datasource.password =12 spring.datasource.hikari.maximum-pool-size =15 spring.datasource.hikari.minimum-idle =5 spring.datasource.hikari.idle-timeout =30000 mybatis.mapper-locations =classpath:mapper/*.xml mybatis.type-aliases-package =com.wanyu.community.entity mybatis.configuration.useGeneratedKeys =true mybatis.configuration.mapUnderscoreToCamelCase =true
对数据库的uesr表进行CRUD 这一步需要用到user表,其DDL信息为:
1
2
3
4
5
6
7
8
9
10
11
12
13
14
15
16
CREATE TABLE `user ` (int NOT NULL AUTO_INCREMENT,varchar (50 ) DEFAULT NULL ,varchar (50 ) DEFAULT NULL ,varchar (50 ) DEFAULT NULL ,varchar (100 ) DEFAULT NULL ,int DEFAULT NULL COMMENT '0-普通用户; 1-超级管理员; 2-版主;' ,int DEFAULT NULL COMMENT '0-未激活; 1-已激活;' ,varchar (100 ) DEFAULT NULL ,varchar (200 ) DEFAULT NULL ,timestamp NULL DEFAULT NULL ,PRIMARY KEY (`id`),20 )),20 ))= InnoDB AUTO_INCREMENT= 151 DEFAULT CHARSET= utf8mb3
这里只需在DAO层进行开发:
(1) 在entity包创建User类
(2) 在dao包创建UserMapper接口,定义接口内的CRUD方法,不要忘记@Mapper注解
(3) 在resources目录下建立mapper文件夹,创建user-mapper.xml的映射文件,并编写xml文件中的sql语句,有几个注意点:
(4) 测试,一定要养成测试的好习惯
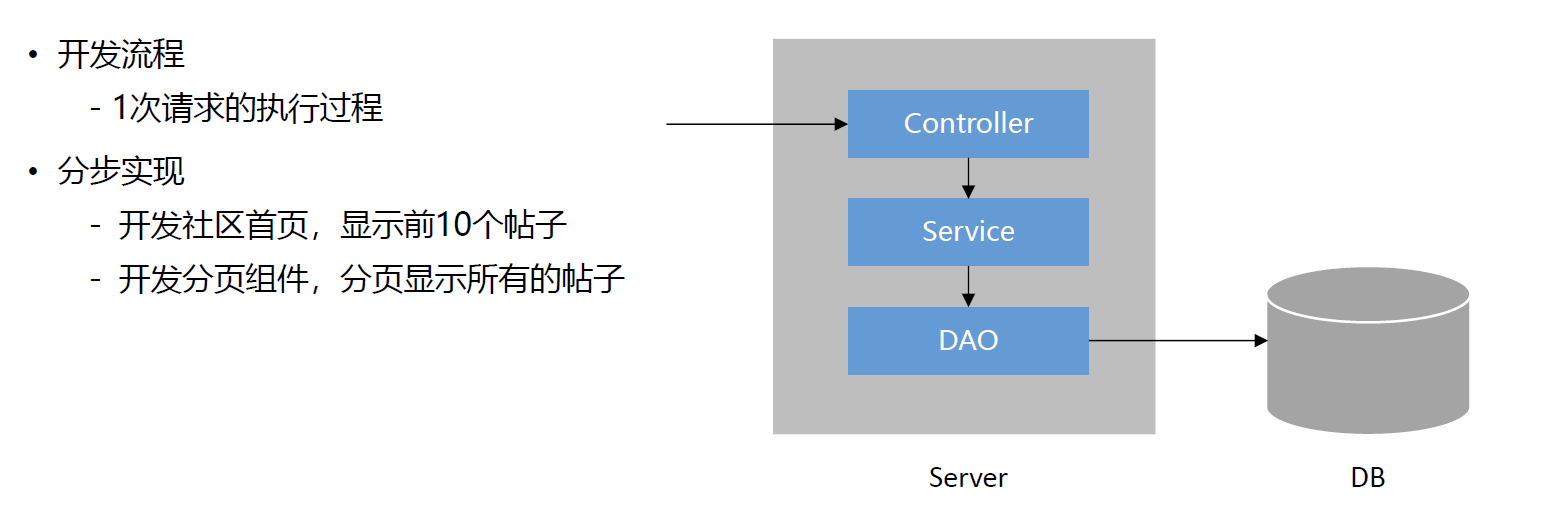
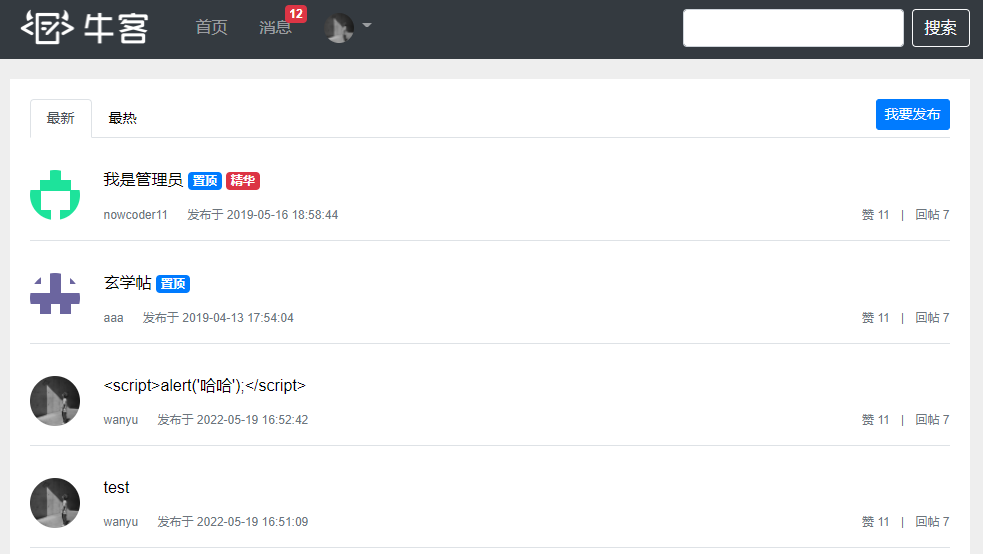
5. 开发社区首页 严格按照三层架构模式开发,这里的社区首页其实就是分页展示一下全部的帖子,暂时的业务理解是:拉黑的帖子不展示,置顶的帖子放在前面,创建时间越新帖子的越放在上面
5.1 数据访问层 这一步需要用到discuss_post表,其DDL信息为:
1
2
3
4
5
6
7
8
9
10
11
12
13
CREATE TABLE `discuss_post` (int NOT NULL AUTO_INCREMENT,varchar (45 ) DEFAULT NULL ,varchar (100 ) DEFAULT NULL ,int DEFAULT NULL COMMENT '0-普通; 1-置顶;' ,int DEFAULT NULL COMMENT '0-正常; 1-精华; 2-拉黑;' ,timestamp NULL DEFAULT NULL ,int DEFAULT NULL ,double DEFAULT NULL ,PRIMARY KEY (`id`),= InnoDB AUTO_INCREMENT= 281 DEFAULT CHARSET= utf8mb3
(1) 在entity包创建DiscussPost类
(2) 在dao包创建DiscussPostMapper接口,定义接口内的查询方法。有几个注意点:
首页查询的帖子要写成分页的格式
如果定义的方法里只有一个参数,并且在等动态sql标签里使用,则必须要加别名,可以用@Param注解
(3) 在resources-mapper文件夹,创建discusspost-mapper.xml的映射文件,这其中有些简单的业务理解.
下面的selectDiscussPosts语句中,status=2表明这是拉黑的帖子,所以不让他显示。userId不等于0,则就是显示所有没被拉黑的帖子,如果传入了userId,就是查看对应userId这个用户发的所有的帖子。排序策略为:置顶的帖子放在前面,创建时间越新帖子的越放在上面
1 2 3 4 5 6 7 8 9 10 <select id ="selectDiscussPosts" resultType ="DiscussPost" > <include refid ="selectFields" > </include > <if test ="userId!=0" > </if > </select >
(4) 测试
5.2 业务层 (1) service包创建DiscussPostService,在其中编写业务代码,虽然暂时都只是简单的调用DAO层接口,但还是要分层编写。有一个注意点是:
有两种解决办法,一种是sql查询的时候关联查询用户,还有一种就是单独再写一个查询,用userId查询到用户名,然后和帖子查询结果拼到一起。此处采用的是后者,看起来麻烦一下,但是为了方便后续Redis使用缓存,提高性能
(2) 所以第二步是在service包再创建UserService,编写方法实现用userId查询到用户名
5.3 表现层 这里需要用到前端的资源,将第1章素材和源码\素材\nowcoder-sql-1.6\nowcoder中的css/img/js都拷贝到工程resources下的static,将mail/site/index.html拷贝到templates中。本小节中只需要用到index.html
(1) 分页作为非常常用的操作,最好能将其封装好,方便复用。在entity实体类下新建Page类(Mybatis是不自带Page类的,虽然其有PageHelper,但需要额外导入,MybatisPlus好像是自带 Ipage对象)。Page类具体有哪些属性和方法去代码里看,注释比较详细了
(2) 在controller层创建HomeController.java,编写controller层代码,也有几个注意点
我们希望Springmvc返回的是视图,所以可以在编写方法时,将Model直接传入,spring会帮我们自动实例化Model
上文提到的查询帖子的同时还查询用户名,可以用Map集合来解决,自动注入DiscussPostService和UserService,然后调用它们的方法解决,具体的见代码
(3) 在template添加的index.html是我们主要改写的文件,首先需要指定我们使用的模板引擎是thymeleaf
1 <html lang ="en" xmlns:th ="http://www.thymeleaf.org" >
有些依赖资源如果是相对路径也需要用thymeleaf的语法 去更改,让他去resources文件夹下的指定地方去查找
1 2 3 4 <link rel ="stylesheet" th:href ="@{/css/global.css}" /> <script th:src ="@{/js/global.js}" > </script > <script th:src ="@{js/index.js}" > </script >
这个地方的第四行js前面不用加斜线吗 好像不加也可以的样子,暂时不管
然后将html的纯静态页面转为基于thymeleaf模板的动态页面,本小节只需要更改帖子列表和分页部分内容,让th循环展示上文定义的map集合里的内容,包括分页的thymeleaf语法,比较复杂,具体写法见代码了,前端代码此处不过多介绍,不是本项目重点,在视频1.6节中有。
(4) 启动服务器,测试功能,url:http://localhost:8080/community/index
此处发现的bug是分页功能只有在点首页、尾页、上一页和下一页时有效,点到具体的页数时是不发生跳转的
6. 项目调试技巧 (1) 根据状态码初步定位到问题在哪里
(2) 服务端断点调试技巧,就是IDEA里的调试,不过多介绍
(3) 客户端断点调试技巧,是在浏览器开发者工具里进行调试,主要是前端工程师调试,不过多介绍
(4) 设置日志级别,并将日志输出到不同的终端
在测试文件夹中添加 LoggerTests 文件进行测试,加入下面这两个注解,保持和主文件的配置条件相同
1 2 @RunWith(SpringRunner.class) @ContextConfiguration(classes = CommunityApplication.class)
随后在application.properties里添加logger级别
1 logging.level.com.wanyu.community =debug
这样只会打印 设置级别在内的及以上的日志级别。平常常用的是debug、info、error 三个级别
日志默认会打印到控制台,我们需要将日志保存到文件里,添加以下配置。
1 logging.file =d:/work/data/nowcoder/community.log # 日志文件存储路径
实际开发的时候肯定会更加复杂,视频1.38最后也讲解了一部分,此处略过
二、SpringBoot实践:开发社区登录模块 1. 发送邮件
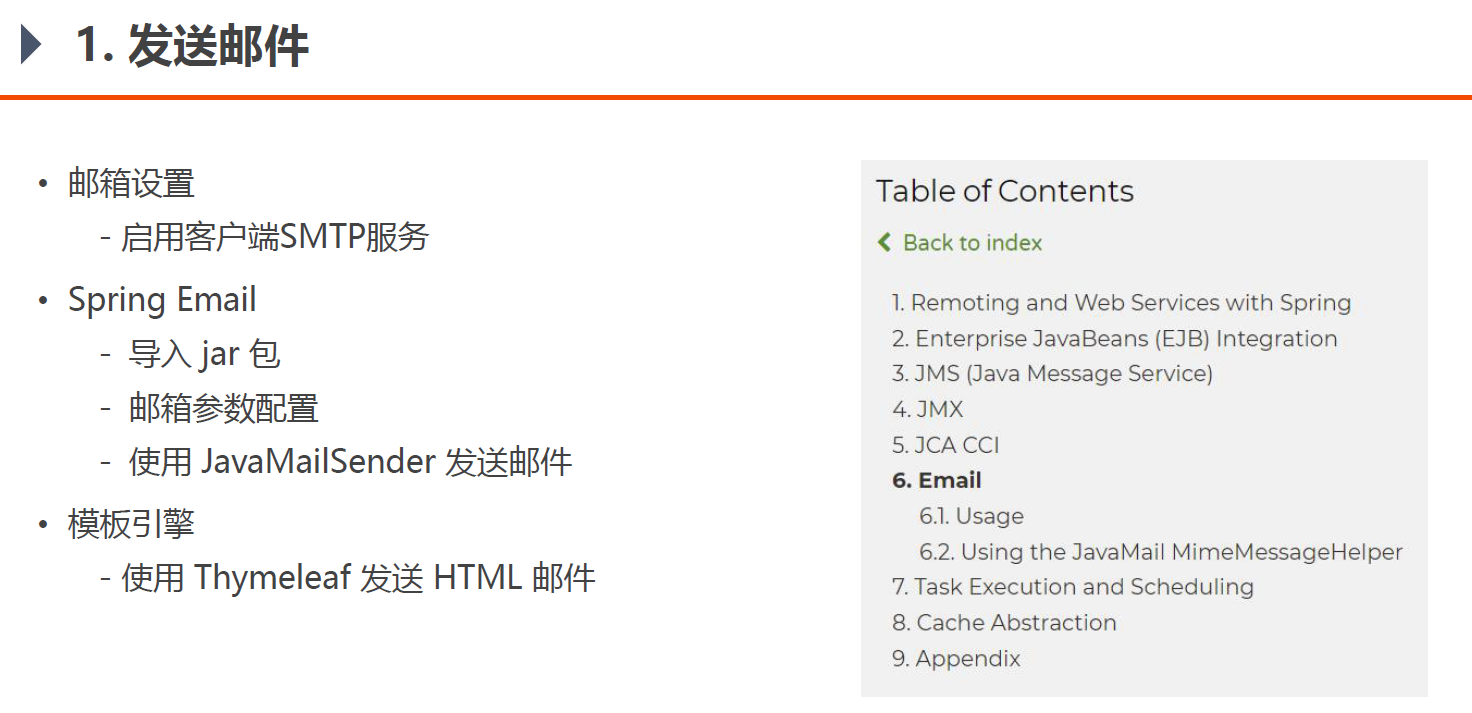
常见的发送邮件功能,学过Springboot整合Mail的话应该很容易
(1)导入坐标
1 2 3 4 <dependency > <groupId > org.springframework.boot</groupId > <artifactId > spring-boot-starter-mail</artifactId > </dependency >
(2)邮箱参数配置(邮箱需要启用SMTP)
1 2 3 spring.mail.host =smtp.163.com spring.mail.username =xxxx@163.com spring.mail.password =xxxx
(3)编写发送邮件的基础功能,使用JavaMailSender发送邮件
代码:util-MailClient.class
没有过多要说的,就是调用接口
(4) 使用Thymeleaf生成模板引擎发送邮件
其实也就是用JavaMailSender发送HTML格式的文本,此处Thymeleaf这个模板引擎用的不是太熟,本质上就是用模板引擎去生成HTML
在resources-templates-mail创建demo.html文件,以此为模板发送邮件
(5)测试类里进行测试
具体的见代码就行,MailTests.java
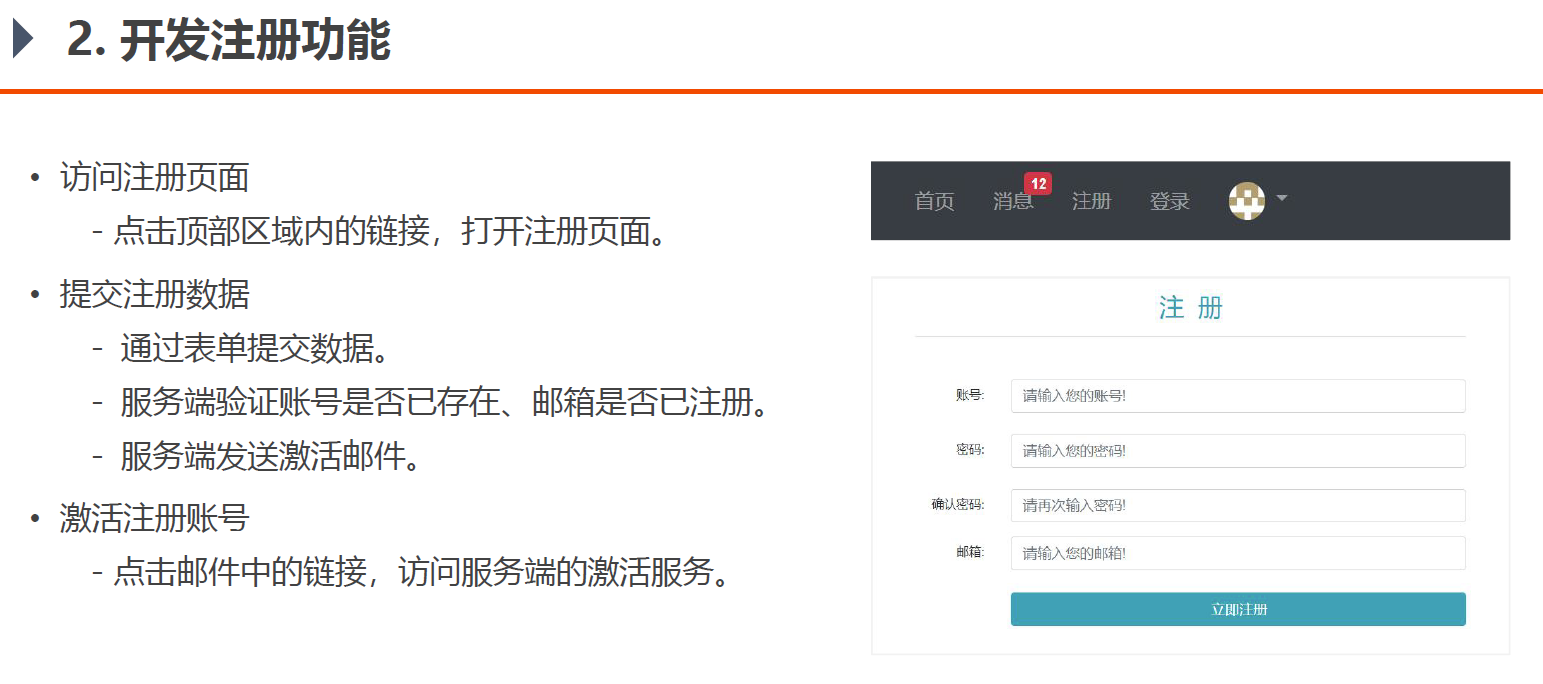
2. 开发注册功能
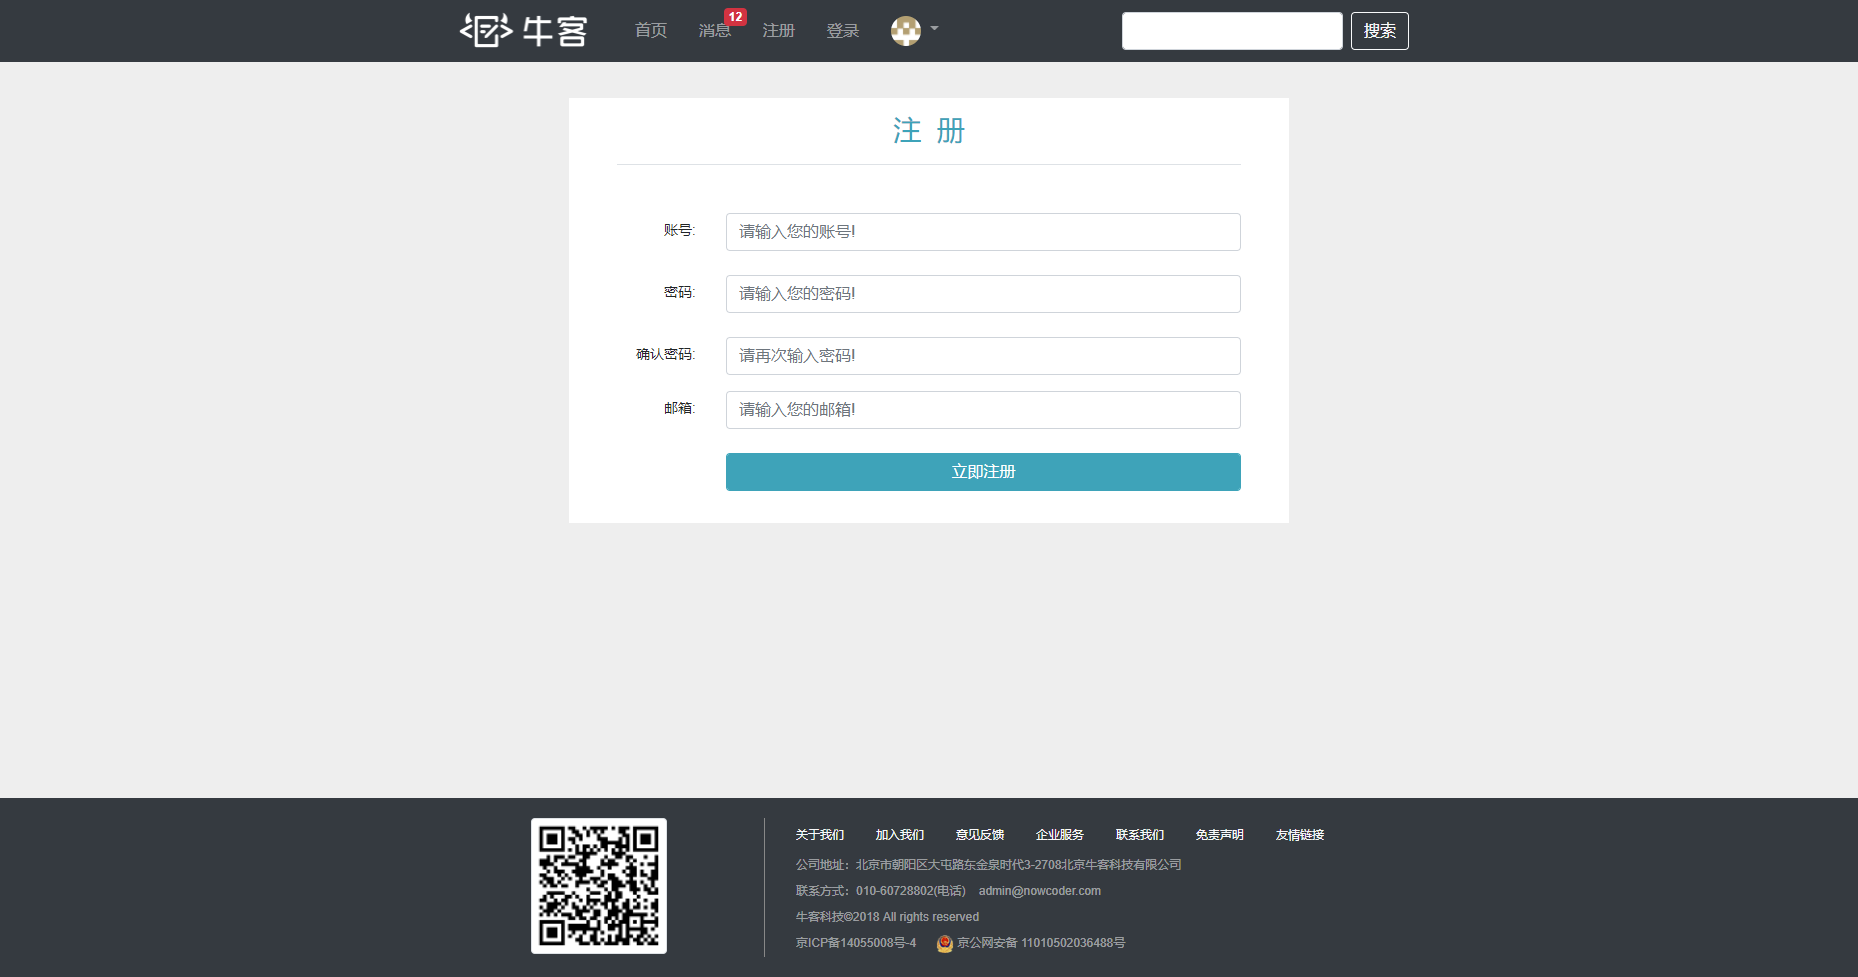
2.1 访问注册页面 (1)在controller包下创建LoginController表现层代码,编写基本的请求处理代码
1 2 3 4 5 6 7 8 @Controller public class LoginController {@RequestMapping(path = "/register", method = RequestMethod.GET) public String getRegisterPage () {return "/site/register" ;
(2)更改templates-site-register.html,使其符合thymeleaf模板的语法,主要是开头引入、相对路径资源
1 2 3 4 5 6 7 <html lang ="en" xmlns:th ="http://www.thymeleaf.org" > <link rel ="stylesheet" th:href ="@{/css/global.css}" /> <link rel ="stylesheet" th:href ="@{/css/login.css}" /> <script th:src ="@{/js/global.js}" > </script > <script th:src ="@{/js/register.js}" > </script >
(3)访问注册页面,是从首页的导航栏中点击的,所以去更改index.html中头部的功能部分,把首页、注册和登录三个部分的相对路径资源改成thymeleaf的形式,其他地方本小节用不到,暂时不用改
1 2 3 4 5 6 7 8 9 <li class ="nav-item ml-3 btn-group-vertical" > <a class ="nav-link" th:href ="@{/index}" > 首页</a > </li > <li class ="nav-item ml-3 btn-group-vertical" > <a class ="nav-link" th:href ="@{/register}" > 注册</a > </li > <li class ="nav-item ml-3 btn-group-vertical" > <a class ="nav-link" th:href ="@{/login}" > 登录</a > </li >
(4)标签复用
因为最终的网页呈现形式中,头部的信息是一直要显示的,所以最好能改成能复用的,thymeleaf也是支持这一点
在index.html中,头部标签上加上属性th:fragment,将其命名为header,这样在其他的html文件里就可以复用这一段程序
1 2 <header class ="bg-dark sticky-top" th:fragment ="header" >
在其他html文件里如何复用这一段程序,只需要加上标签th:replace,比如在register.html中,更改头部标签
1 <header class ="bg-dark sticky-top" th:replace ="index::header" >
(5)测试,启动项目,访问http://localhost:8080/community/index,点击注册按钮,没有问题的话可以成功访问注册页面,也可以点击首页按钮回到首页
2.2 提交注册数据 工具类 (1)为了更好对字符串、集合空值 的情况进行检测,我们需要额外引入一个包commons-lang3,以后也是经常用
1 2 3 4 <dependency > <groupId > org.apache.commons</groupId > <artifactId > commons-lang3</artifactId > </dependency >
(2)在配置文件里配置本机域名,因为发邮件链接激活的时候肯定得访问社区网站来进行激活,所以需要配置一下,真正开发中,当然不可能是本机域名,此处暂时用
1 2 community.path.domain =http://localhost:8080
(3)为了更好的复用功能,编写一些工具类,在util包下创建CommunityUtil类
首先是生成随机字符串,Java中的util包自带UUID可以实现,我们需要进行简单的封装
1 2 3 4 public static String generateUUID () {return UUID.randomUUID().toString().replaceAll("-" , "" );
对密码进行MD5加密,为了提高安全性,使用加盐加密,即用一段随机的字符串拼接在用户传入的密码中,再进行MD5加密
1 2 3 4 5 6 public static String md5 (String key) {if (StringUtils.isBlank(key)) { return null ;return DigestUtils.md5DigestAsHex(key.getBytes());
业务层 (4)注册功能业务层上是对User业务的编写,所以需要编写UserService,由于注册业务需要向用户邮箱发邮件,并且发送是Thymeleaf引擎得到的html,所以要将邮件类、模板引擎、域名、项目名全部注入进来。注意非Bean类型的需要用@Value注解得到,这一部分就是如何获取配置文件里的值,可以去找找SpringBoot教程看看
1 2 3 4 5 6 7 8 9 10 11 @Autowired private MailClient mailClient;@Autowired private TemplateEngine templateEngine;@Value("${community.path.domain}") private String domain;@Value("${server.servlet.context-path}") private String contextPath;
再对业务进行编写,如空值判断处理、账号或邮箱重复判断、注册用户(即将用户提交的信息再加上一些处理存到数据库里) 注册方法返回值是一个map,里面主要封装一些错误消息,比如账号密码为空等消息
1 2 3 4 5 6 7 8 9 10 11 12 13 14 15 16 17 18 19 20 21 22 23 24 25 26 27 28 29 30 31 32 33 34 35 36 37 38 39 40 41 42 43 44 45 46 47 public Map<String, Object> register (User user) {new HashMap <>();if (user == null ) {throw new IllegalArgumentException ("参数不能为空!" );if (StringUtils.isBlank(user.getUsername())) {"usernameMsg" , "账号不能为空!" );return map;if (StringUtils.isBlank(user.getPassword())) {"passwordMsg" , "密码不能为空!" );return map;if (StringUtils.isBlank(user.getEmail())) {"emailMsg" , "邮箱不能为空!" );return map;User u = userMapper.selectByName(user.getUsername());if (u != null ) {"usernameMsg" , "该账号已存在!" );return map;if (u != null ) {"emailMsg" , "该邮箱已被注册!" );return map;0 , 5 ));0 );0 ); "http://images.nowcoder.com/head/%dt.png" , new Random ().nextInt(1000 ))); new Date ());return map;
(5)注册功能是包含发送激活邮件的,显然需要发送一个html格式的文本,需要用到模板,其位置为templates-mail-activation.html,并将其改造成模板。部分位置设置为可变的
1 2 3 4 5 6 7 8 9 10 11 12 <body > <div > <p > <b th:text ="${email}" > xxx@xxx.com</b > , 您好!</p > <p > <a th:href ="${url}" > 此链接</a > ,</p > </div > </body >
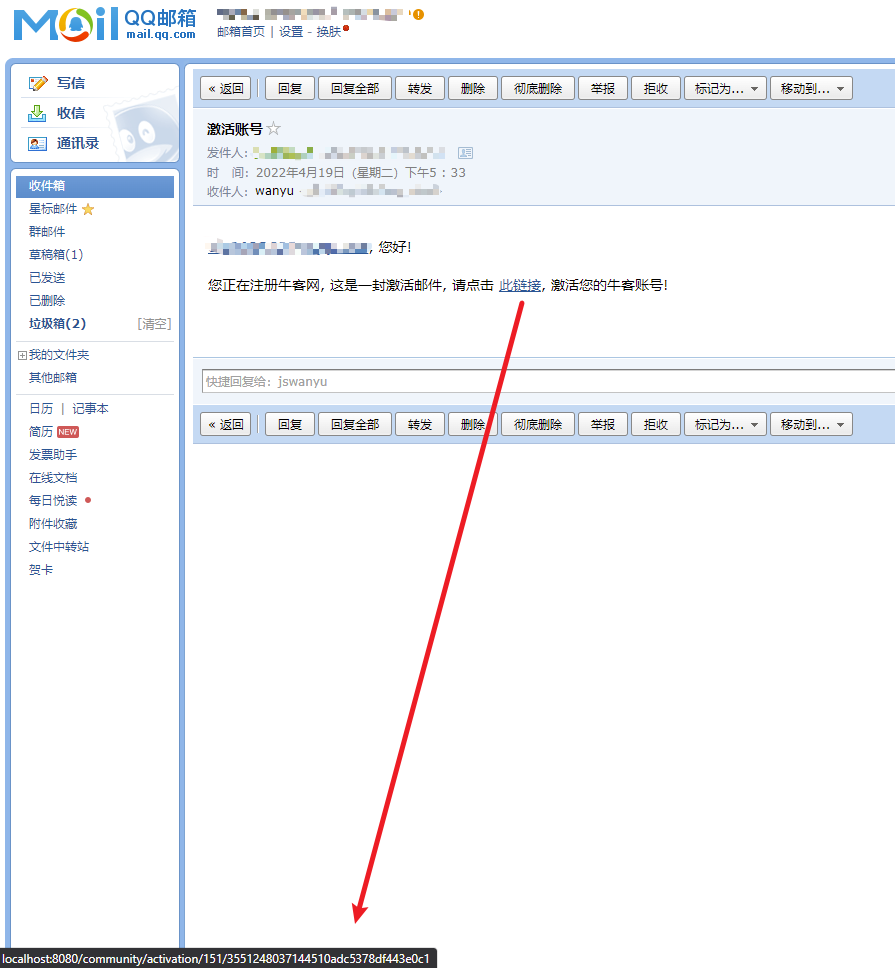
如果后续激活邮件成功发送,其图片如下,如果鼠标悬停在此链接上,左下角会出现url
(6)再编写激活邮件功能,可以理解为是将发送邮件部分的测试代码改写到此处,用到了thymeleaf的context,process等对象和方法,需要多熟练使用。其中email和url需要动态的设置,注意url拼接的思路
1 2 3 4 5 6 7 8 9 10 11 public Map<String, Object> register (User user) {Context context = new Context ();"email" , user.getEmail());String url = domain + contextPath + "/activation/" + user.getId() + "/" + user.getActivationCode();"url" , url);String content = templateEngine.process("/mail/activation" , context);"激活账号" , content);
表现层 (7)后面需要在表现层继续开发,在LoginController里编写register,编写表现层代码,添加返回各种模型视图。
注意此处的表现层逻辑:
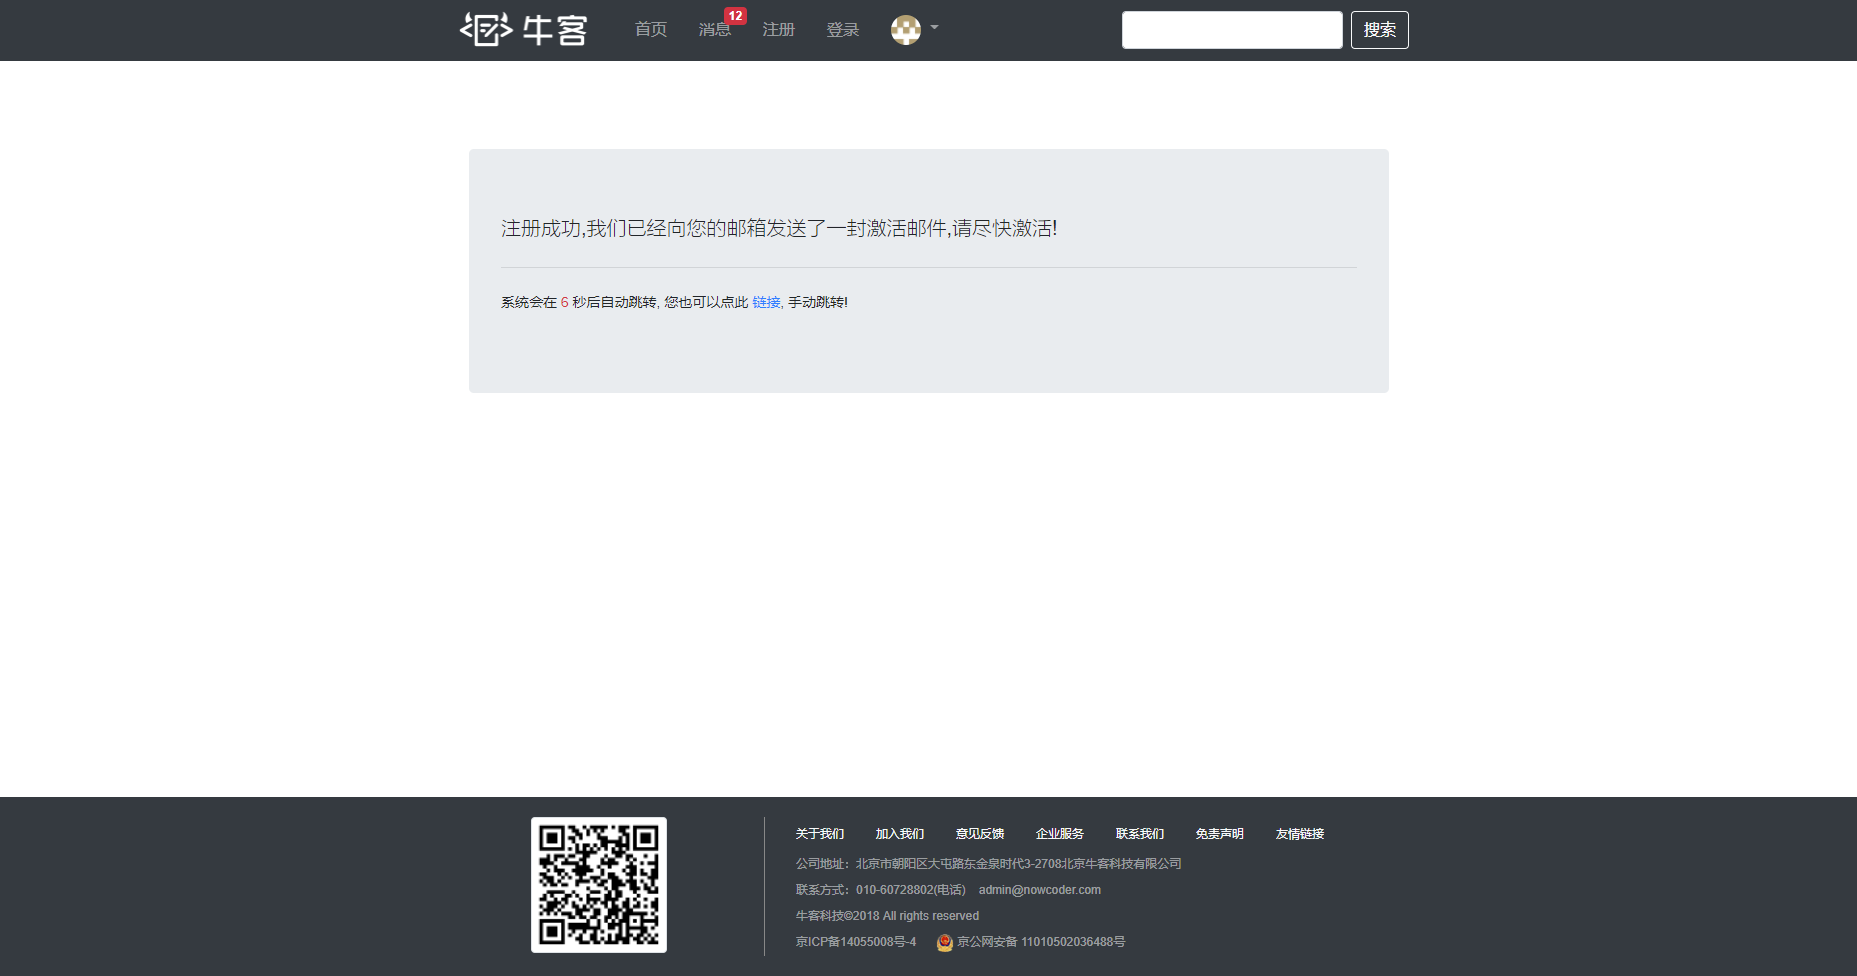
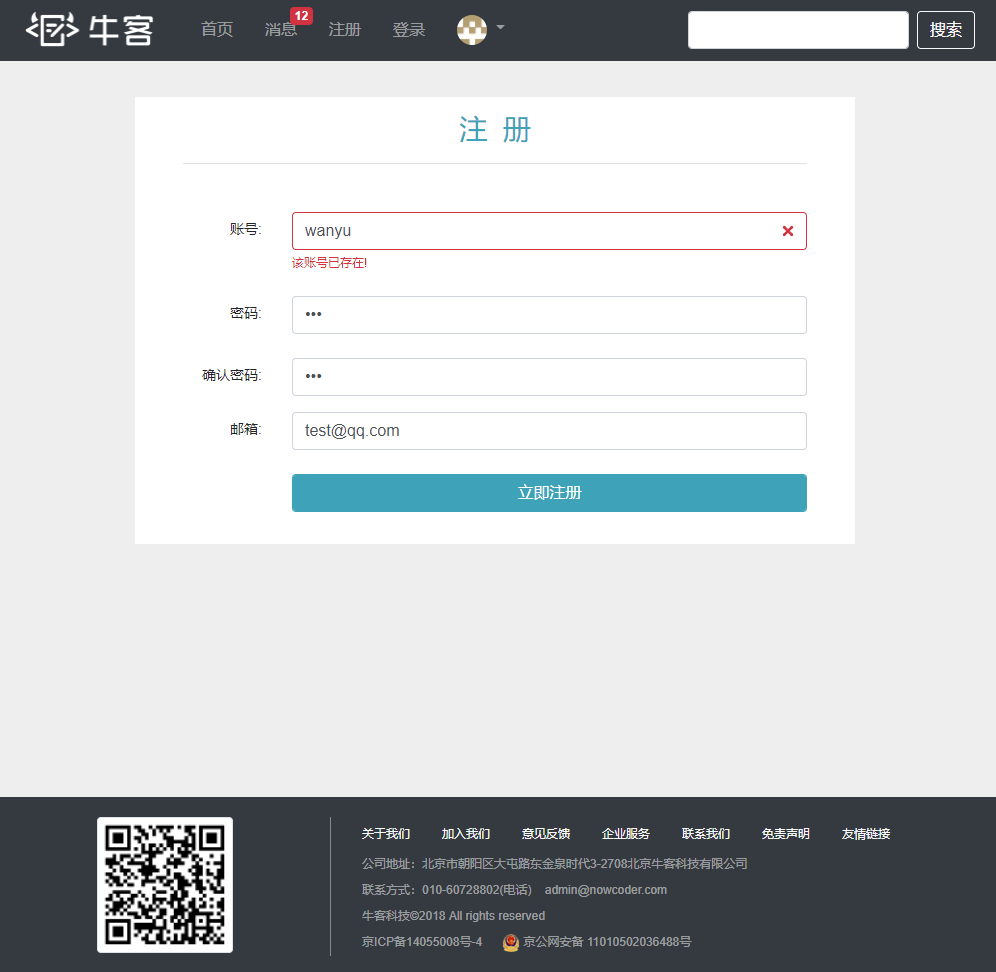
(8)此时可以去进行测试,看是否能够注册成功,包括用户名、邮箱重复的一些检测
2.3 激活注册账号 (1)激活有三种结果:成功、重复激活、失败,可以将这三种状态设为常量,写成接口放在util包里
1 2 3 4 5 public interface CommunityConstant {int ACTIVATION_SUCCESS = 0 ; int ACTIVATION_REPEAT = 1 ; int ACTIVATION_FAILURE = 2 ;
业务层 (2)在UserService里编写激活代码,让其实现上述接口,业务层激活代码的逻辑就是邮件链接里的激活码和根据用户id查到的激活码是否相等。根据不同的情况,返回状态码,注意让UserService实现CommunityConstant接口
1 2 3 4 5 6 7 8 9 10 11 12 13 public class UserService implements CommunityConstant {public int activation (int userId, String code) {User user = userMapper.selectById(userId);if (user.getStatus() == 1 ) { return ACTIVATION_REPEAT;else if (user.getActivationCode().equals(code)) { 1 );return ACTIVATION_SUCCESS;else {return ACTIVATION_FAILURE;
表现层 (3)在LoginController里编写激活代码,也让其实现上述接口,根据状态码返回激活成功或失败的提示页面。返回的html页面还是之前的operate-result.html,放置提示消息和跳转页面。如果激活成功跳转到登陆界面,如果重复激活或者激活失败,跳转到首页。
注意当用户点击邮件里的链接时,是去访问类似于:// http://localhost:8080/community/activation/101/code,如何从这个url获取用于判断激活的信息,是通过**注解@PathVariable **
1 2 3 4 5 6 7 8 9 10 11 12 13 14 15 16 @RequestMapping(path = "/activation/{userId}/{code}", method = RequestMethod.GET) public String activation (Model model, @PathVariable("userId") int userId, @PathVariable("code") String code) {int result = userService.activation(userId, code);if (result == ACTIVATION_SUCCESS) {"msg" , "激活成功,您的账号已经可以正常使用了!" );"target" , "/login" );else if (result == ACTIVATION_REPEAT) {"msg" , "无效操作,该账号已经激活过了!" );"target" , "/index" );else {"msg" , "激活失败,您提供的激活码不正确!" );"target" , "/index" );return "/site/operate-result" ;
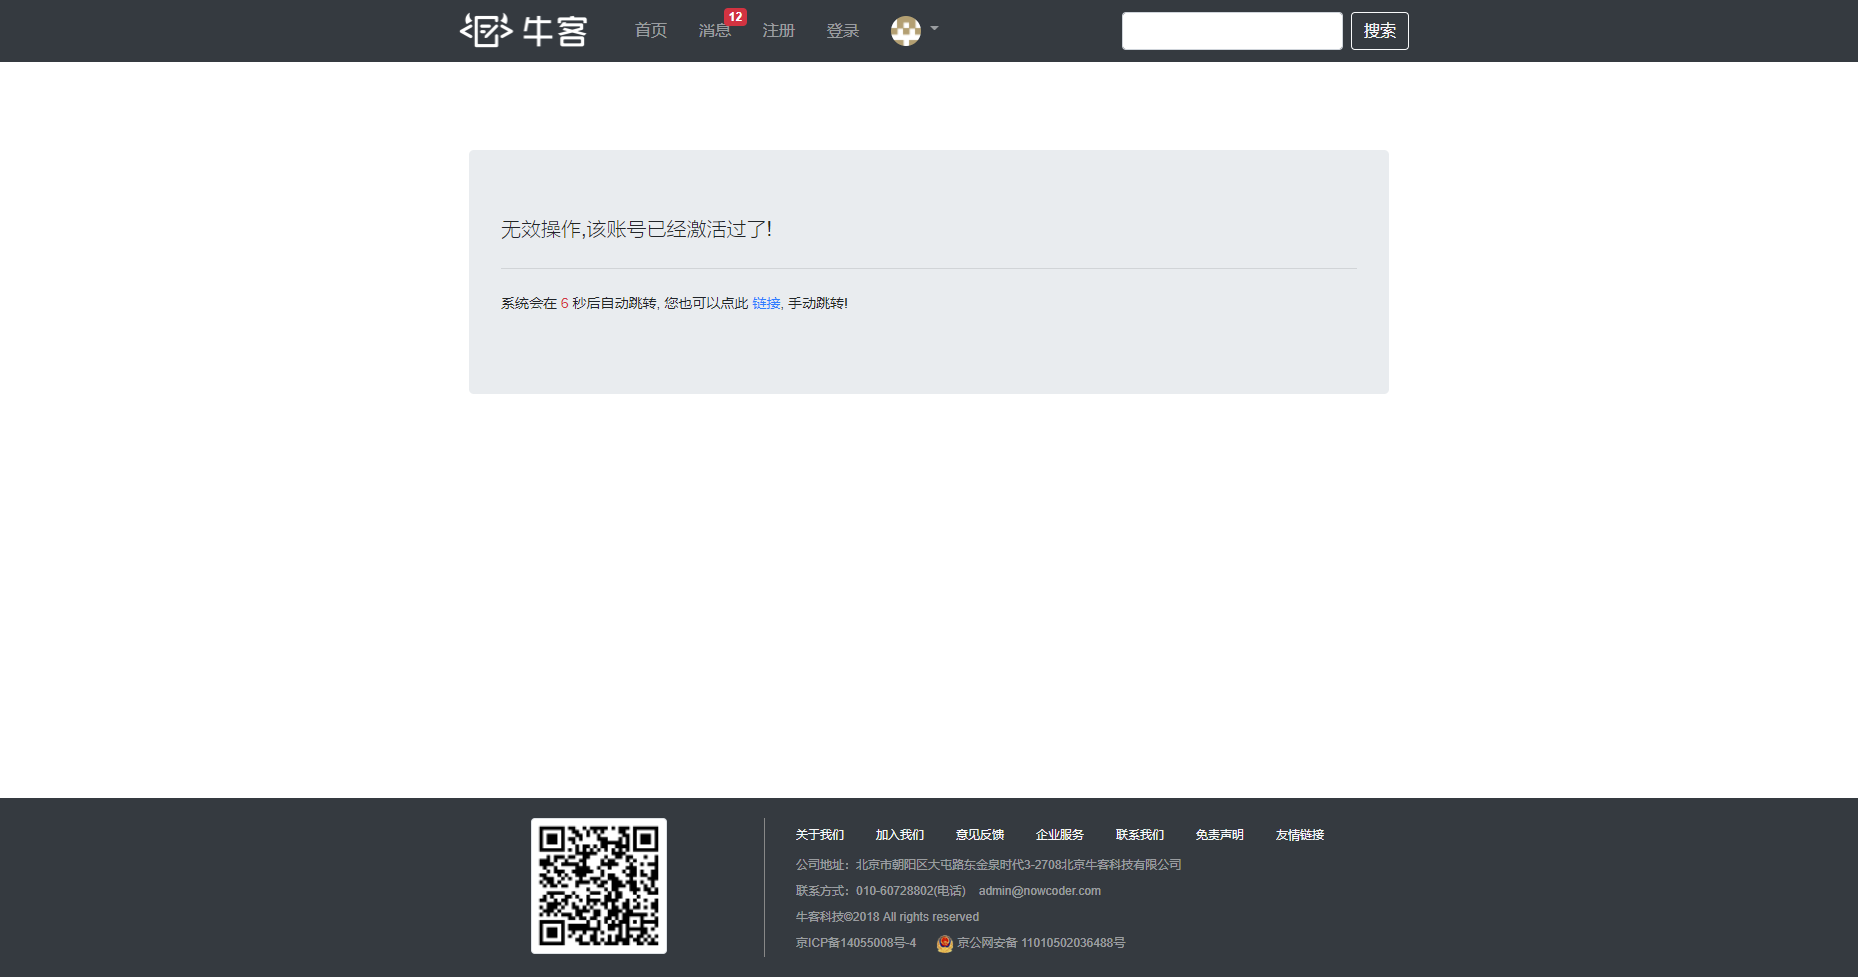
最终的返回页面为下面的提示信息页面(此截图是重复激活的页面)
测试账号:wanyu
测试密码:123
3. 会话管理
这一部分是开发登录功能的前置知识,cookie和session
cookie是客户端会话技术,将数据保存到客户端,以后每次请求都携带Cookie数据进行访问。
1 2 3 4 5 6 7 8 9 10 11 12 13 14 15 16 17 18 19 20 21 22 23 24 @RequestMapping(path = "/cookie/set", method = RequestMethod.GET) @ResponseBody public String setCookie (HttpServletResponse response) {Cookie cookie = new Cookie ("code" , CommunityUtil.generateUUID());"/community/alpha" );60 * 10 );return "set cookie" ;@RequestMapping(path = "/cookie/get", method = RequestMethod.GET) @ResponseBody public String getCookie (@CookieValue("code") String code) {return "get cookie" ;
Session是服务端会话跟踪技术:将数据保存到服务端。
Cookie是存储在客户端,存储在客户端的数据容易被窃取和截获,存在很多不安全的因素,存储在服务端的数据相比于客户端来说就更安全
1 2 3 4 5 6 7 8 9 10 11 12 13 14 15 16 @RequestMapping(path = "/session/set", method = RequestMethod.GET) @ResponseBody public String setSession (HttpSession session) {"id" , 1 );"name" , "Test" );return "set session" ;@RequestMapping(path = "/session/get", method = RequestMethod.GET) @ResponseBody public String getSession (HttpSession session) {"id" ));"name" ));return "get session" ;
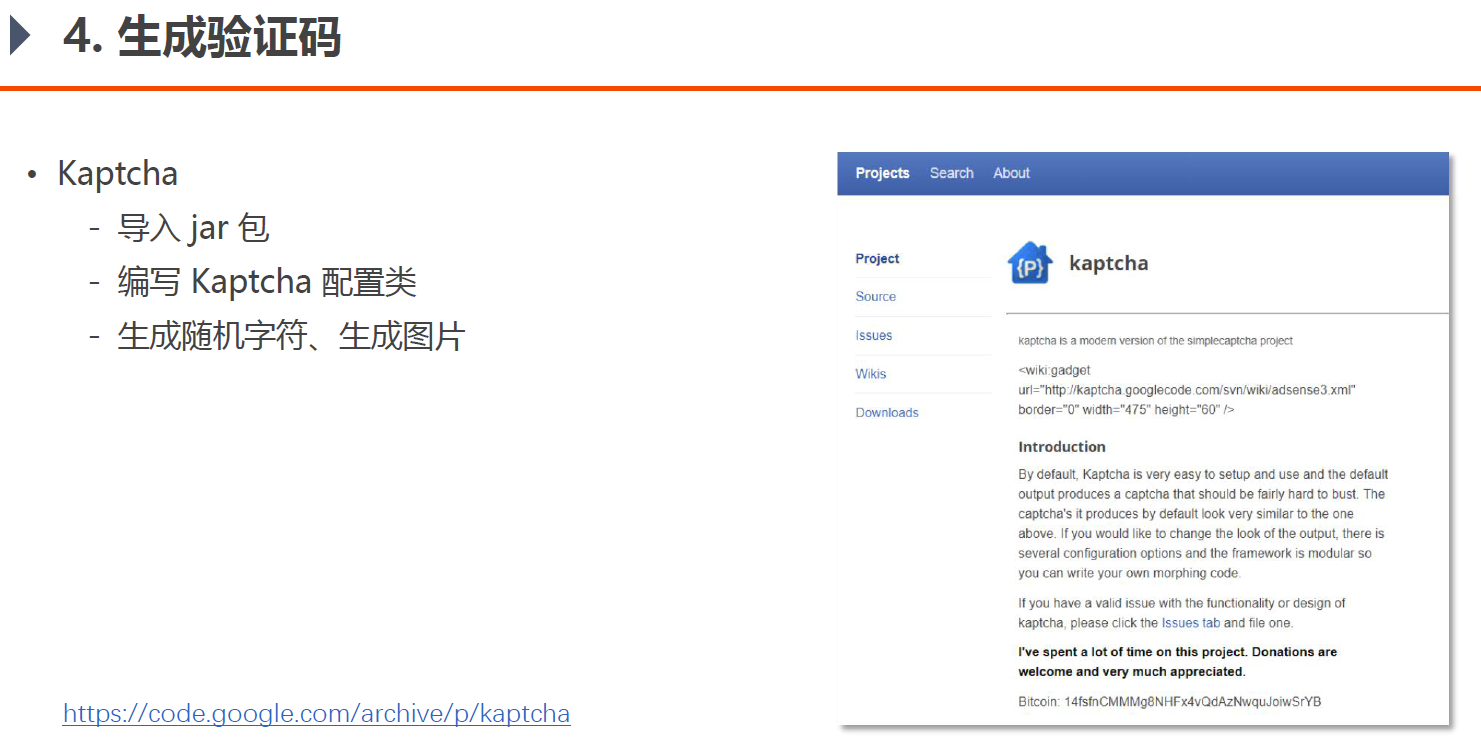
4. 生成验证码
Kaptcha包有现成的验证码功能,本项目导入这个包来使用
1 2 3 4 5 <dependency > <groupId > com.github.penggle</groupId > <artifactId > kaptcha</artifactId > <version > 2.3.2</version > </dependency >
在config包下编写Kaptcha的配置文件,将其作为bean
1 2 3 4 5 6 7 8 9 10 11 12 13 14 15 16 17 18 19 @Configuration public class KaptchaConfig {@Bean public Producer kaptchaProducer () {Properties properties = new Properties ();"kaptcha.image.width" , "100" );"kaptcha.image.height" , "40" );"kaptcha.textproducer.font.size" , "32" );"kaptcha.textproducer.font.color" , "0,0,0" );"kaptcha.textproducer.char.string" , "0123456789ABCDEFGHIJKLMNOPQRSTUVWXYAZ" );"kaptcha.textproducer.char.length" , "4" );"kaptcha.noise.impl" , "com.google.code.kaptcha.impl.NoNoise" );DefaultKaptcha kaptcha = new DefaultKaptcha ();Config config = new Config (properties);return kaptcha;
然后在LoginController表现层尝试输出下验证码图片,加入下列代码。其中比较重要的就是验证码作为敏感信息,是要存入session里 的,同时注意输出图片给浏览器是用字节流的形式输出
1 2 3 4 5 6 7 8 9 10 11 12 13 14 15 16 17 18 @RequestMapping(path = "/kaptcha", method = RequestMethod.GET) public void getKaptcha (HttpServletResponse response, HttpSession session) {String text = kaptchaProducer.createText();BufferedImage image = kaptchaProducer.createImage(text);"kaptcha" , text);"image/png" );try {OutputStream os = response.getOutputStream();"png" , os);catch (IOException e) {"响应验证码失败:" + e.getMessage());
随后可以访问:http://localhost:8080/community/kaptcha 进行测试,每次刷新都会更新验证码图片。
下一步就是将验证码显示到登录页面中,我们希望的是点击“刷新验证码”按钮也会刷新验证码
在login.html中将验证码路径改为前面设置的路径/kaptcha,再去改刷新验证码这个超链接对应的js方法refresh_kaptcha()。"/kaptcha?p=" + Math.random();是因为欺骗一下浏览器,每次都是动态的,要不然每次都是静态url,浏览器会认为没变化
1 2 3 4 5 6 7 8 9 10 11 12 13 <div class ="col-sm-4" > <img th:src ="@{/kaptcha}" id ="kaptcha" style ="width:100px;height:40px;" class ="mr-2" /> <a href ="javascript:refresh_kaptcha();" class ="font-size-12 align-bottom" > 刷新验证码</a > </div > <script > function refresh_kaptcha ( var path = CONTEXT_PATH + "/kaptcha?p=" + Math .random (); $("#kaptcha" ).attr ("src" , path); } </script >
上面的CONTEXT_PATH是因为如果每次都要写community会比较烦,可以去global.js里配置一下CONTEXT_PATH
1 var CONTEXT_PATH = "/community"
接下来可以进行最终的测试,访问http://localhost:8080/community/login,点击“刷新验证码”
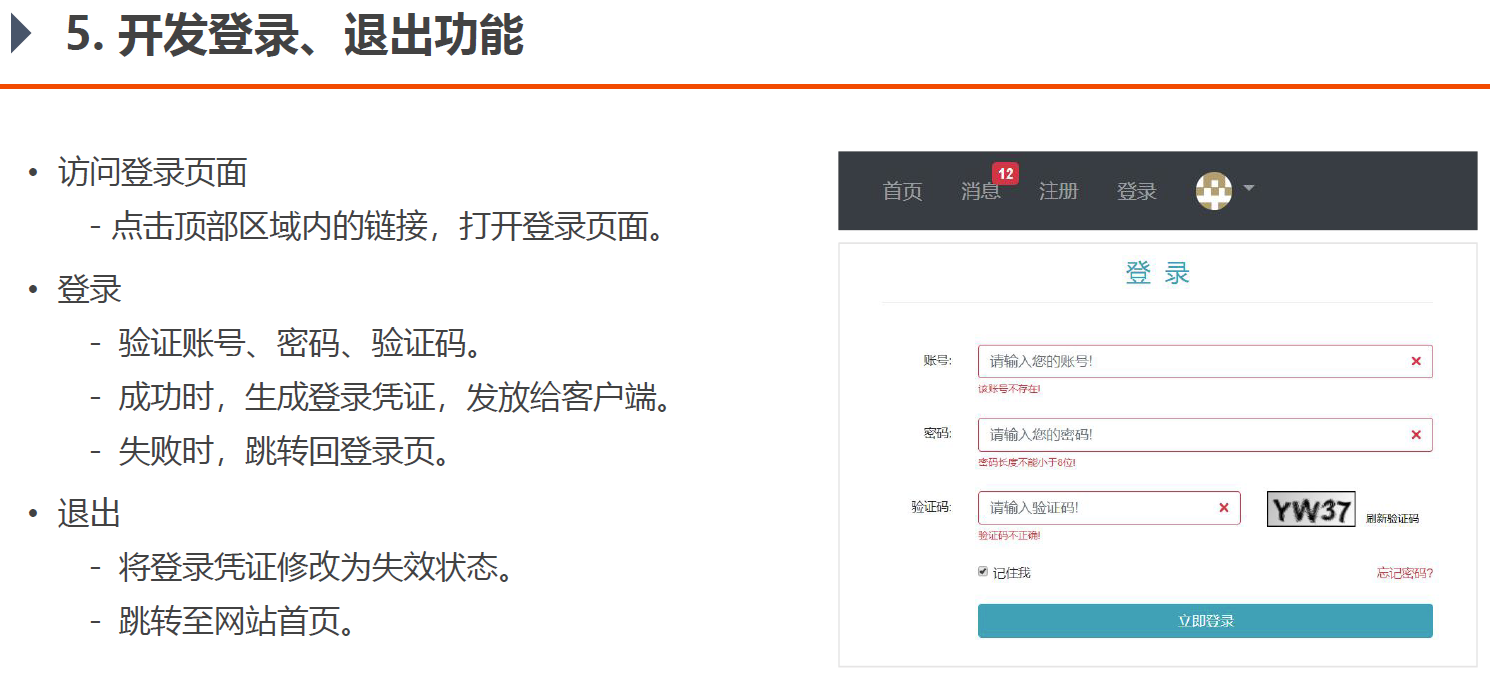
5. 开发登录、退出功能
数据层 登录验证功能额外需要一个表来记录登录凭证,这个本身其实是可以用Session来使用,相当于记录用户登录身份,此处没有用Session,而是用Cookie,使用了这个登录凭证来记录,用户登录成功之后,服务端生成一个凭证发给客户端,客户端下次访问时将凭证发给服务端,服务端看用户凭证没问题,也没过期,就让他直接登录,不用重新登录
1 2 3 4 5 6 7 8 create table login_ticketint auto_increment primary key,int not null ,varchar (45 ) not null ,int default 0 null comment '0-有效; 1-无效;' ,timestamp not null
因此首先在entity包下创建该实体类LoginTicket
将对应字段封装起来并创建get set方法
随后在dao包下创建数据访问接口 并封装好增加、查询、修改方法
1 2 3 4 5 6 7 8 9 10 11 12 13 14 15 16 17 18 19 20 21 22 23 24 25 @Mapper public interface LoginTicketMapper {@Insert({ "insert into login_ticket(user_id,ticket,status,expired) ", "values(#{userId},#{ticket},#{status},#{expired})" }) @Options(useGeneratedKeys = true, keyProperty = "id") int insertLoginTicket (LoginTicket loginTicket) ;@Select({ "select id,user_id,ticket,status,expired ", "from login_ticket where ticket=#{ticket}" }) selectByTicket (String ticket) ;@Update({ "<script>", "update login_ticket set status=#{status} where ticket=#{ticket} ", "<if test=\"ticket!=null\"> ", "and 1=1 ", //演示用,没有实际价值 "</if>", "</script>" }) int updateStatus (String ticket, int status) ;
随后严谨一点需要先测试,测试成功了再继续开发
业务层 随后在UserService里继续开发,毕竟登录也算是用户的行为
登录的返回情况有很多种,大分类就是成功和失败,但失败了可能是账号不存在、账号未激活、密码错误等情况,所以我们返回一个map,用来记录多种信息。函数参数有用户名、密码、希望过期的时间
1 2 3 public Map<String, Object> login (String username, String password, int expiredSeconds) {return null ;
随后开始编写此函数
1 2 3 4 5 6 7 8 9 10 11 12 13 14 15 16 17 18 19 20 21 22 23 24 25 26 27 28 29 30 31 32 33 34 35 36 37 38 39 40 41 42 43 44 45 public Map<String, Object> login (String username, String password, int expiredSeconds) {new HashMap <>();if (StringUtils.isBlank(username)) { "usernameMsg" , "账号不能为空!" );return map;if (StringUtils.isBlank(password)) {"passwordMsg" , "密码不能为空!" );return map;User user = userMapper.selectByName(username); if (user == null ) {"usernameMsg" , "该账号不存在!" );return map;if (user.getStatus() == 0 ) {"usernameMsg" , "该账号未激活!" );return map;if (!user.getPassword().equals(password)) {"passwordMsg" , "密码不正确!" );return map;LoginTicket loginTicket = new LoginTicket ();0 ); new Date (System.currentTimeMillis() + (long )expiredSeconds * 1000 )); "ticket" , loginTicket.getTicket()); return map;
随后再开发退出功能的业务层代码
1 2 3 4 public void logout (String ticket) {1 );
表现层 接下来就是开发表现层,逻辑也不难,当用户访问登录页面时,提交用户名、密码、验证码三个表单,交给业务层去判断处理,如果成功,就跳转到首页,不成功还是留在登录页面,并给出对应提示
定位到LoginController文件,继续编写表现层逻辑
编写login函数,虽然路径同样是”/login”,但请求的方式不同,这样是可以让路径相同的,之前的getLoginPage方法请求方式是GET方法,本次要提交表单,所以使用POST方法
前三个参数是用户名、密码、验证码,第四个是“是否勾选记住我”选项,第五个参数是Spirngmvc的模型Model,第六个参数是Session,因为前面将验证码放到了Session里,第七个参数是因为要用到Cookie,所以要使用HttpServletResponse。本方法参数较多
1 2 @RequestMapping(path = "/login", method = RequestMethod.POST) public String login (String username, String password, String code, boolean rememberme, Model model, HttpSession session, HttpServletResponse response) {
首先在表现层判断验证码,不在业务层里判断验证码。随后检查账号和密码,由于业务层的userService.login方法需要传入一个希望失效的时间,因此我们需要根据是否勾选“记住我”选项来决定超时时间,还是放在CommunityConstant接口中
1 2 3 4 5 6 7 8 9 int DEFAULT_EXPIRED_SECONDS = 3600 * 12 ;int REMEMBER_EXPIRED_SECONDS = 3600 * 24 * 100 ;
剩下的就是调用业务层login方法,返回一个map,拿这个map里的信息编写业务层逻辑,完整的代码为:
1 2 3 4 5 6 7 8 9 10 11 12 13 14 15 16 17 18 19 20 21 22 23 24 25 26 @RequestMapping(path = "/login", method = RequestMethod.POST) public String login (String username, String password, String code, boolean rememberme, Model model, HttpSession session, HttpServletResponse response) {String kaptcha = (String) session.getAttribute("kaptcha" );if (StringUtils.isBlank(kaptcha) || StringUtils.isBlank(code) || !kaptcha.equalsIgnoreCase(code)) { "codeMsg" , "验证码不正确!" );return "/site/login" ;int expiredSeconds = rememberme ? REMEMBER_EXPIRED_SECONDS : DEFAULT_EXPIRED_SECONDS; if (map.containsKey("ticket" )) { Cookie cookie = new Cookie ("ticket" , map.get("ticket" ).toString()); return "redirect:/index" ; else {"usernameMsg" , map.get("usernameMsg" ));"passwordMsg" , map.get("passwordMsg" ));return "/site/login" ;
随后再开发退出功能的表现层代码
1 2 3 4 5 6 @RequestMapping(path = "/logout", method = RequestMethod.GET) public String logout (@CookieValue("ticket") String ticket) { return "redirect:/login" ;
这里额外提一嘴,controller方法里多次使用了返回重定向,它们和直接返回的区别为:
return “/site/index”是返回一个模板路径,本次请求没有处理完,DispatcherServlet会将Model中的数据和对应的模板提交给模板引擎,让它继续处理完这次请求。
return “redirect:/index”是重定向,表示本次请求已经处理完毕,但是没有什么合适的数据展现给客户端,建议客户端再发一次请求,访问”/index”以获得合适的数据。
controller里面的login方法 为啥要用重定向呢,直接用return 视图名为啥就不行呢
转发解决的的一次请求内部的跳转,重定向解决的是2次请求之间的跳转。
HTTP协议里,请求就是指浏览器向服务器发起的一次访问,包括4个环节,建立连接、发送请求、接收请求、关闭连接。转发就是浏览器向服务器发了一次请求,服务器通过controller处理,但是它没处理完,将请求交给另外一个组件处理,还是同一个请求,没有跳出服务端,最后由第二个组件给浏览器做响应。
二次请求,就是浏览器向服务器发出一次请求,服务器某组件将其完整处理完了,给浏览器一个响应,并建议浏览器访问另外的组件,以刷新页面的内容。浏览器发出第二次请求,是独立的,和第一次无关的请求
前端和测试 编写前端代码,不是重点,我就只记录个大概了
1 2 3 4 5 6 7 8 9 <form class ="mt-5" method ="post" th:action ="@{/login}" > </form > 声明表单提交给谁,提交方法
测试:
访问http://localhost:8080/community/login,根据目前的用户数据库里的测试用户,测试本节开发的功能。
账号:wanyu 密码:123
测试内容
(1)首先是页面的提示,账号不存在、密码错误等
(2)登陆成功后,浏览器开发者工具里应该能够查到对应名为ticket的cookie,其值应该和数据库表login_ticket的值相同,对应的user_id应该是wanyu的user_id,status应该为0,如果勾选了记住我,失效时间应该是1个月后
(3)退出登陆后,数据库表login_ticket对应的ticket记录其status应该为1,表示失效了
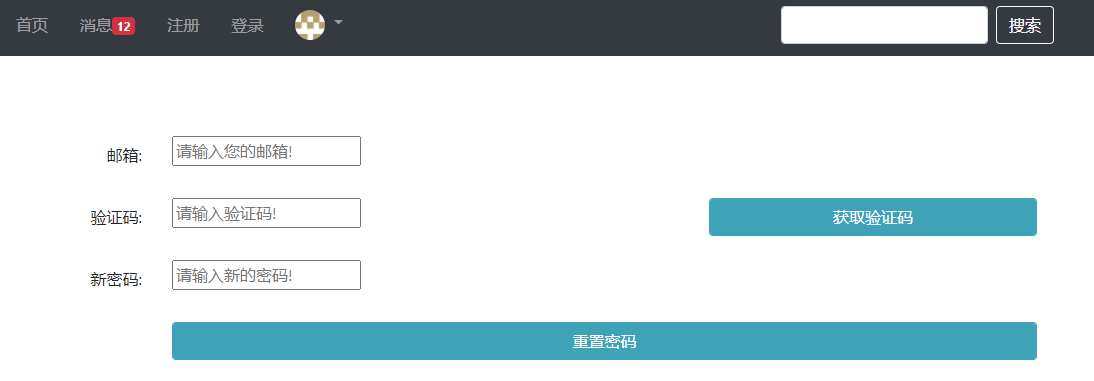
忘记密码 这是作为课后作业的一个功能,将它补充完整。涉及到的前端文件全部用参考答案里的对应前端文件替换掉
首先在表现层加入忘记密码的页面请求,LoginController中加入:
1 2 3 4 5 @RequestMapping(path = "/forget", method = RequestMethod.GET) public String getForgetPage () {return "/site/forget" ;
然后按照三层架构进行开发,数据访问层不用更改啥,业务层的逻辑是根据传入的邮箱和新密码实现重置密码功能,验证方法是,向邮箱发送验证码
先编写业务层代码:
1 2 3 4 5 6 7 8 9 10 11 12 13 14 15 16 17 18 19 20 21 22 23 24 25 26 27 28 29 30 31 32 33 34 public User findUserByName (String username) {return userMapper.selectByName(username);public Map<String, Object> resetPassword (String email, String password) {new HashMap <>();if (StringUtils.isBlank(email)) {"emailMsg" , "邮箱不能为空!" );return map;if (StringUtils.isBlank(password)) {"passwordMsg" , "密码不能为空!" );return map;User user = userMapper.selectByEmail(email);if (user == null ) {"emailMsg" , "该邮箱尚未注册!" );return map;"user" , user);return map;
再编写表现层代码:
获取验证码环节需要注入之前编写的邮箱类MailClient,还需要使用TemplateEngine模板引擎类。还有JSON字符串转换的工具类(这部分第二章课程里没提到,在后续课程里,此处先在CommunityUtil里加上)。此部分的验证码还是保存在session里
1 2 3 4 5 6 7 8 9 10 11 12 13 14 15 16 17 18 19 20 21 @RequestMapping(path = "/forget/code", method = RequestMethod.GET) @ResponseBody public String getForgetCode (String email, HttpSession session) {if (StringUtils.isBlank(email)) {return CommunityUtil.getJSONString(1 , "邮箱不能为空!" );Context context = new Context ();"email" , email);String code = CommunityUtil.generateUUID().substring(0 , 4 );"verifyCode" , code);String content = templateEngine.process("/mail/forget" , context);"找回密码" , content);"verifyCode" , code);return CommunityUtil.getJSONString(0 );
接下来就是编写用户点击重置密码按钮发送的请求,首先要从Session里获取验证码,并对比用户填写的验证码。验证码正确则是调用业务层方法重置密码
1 2 3 4 5 6 7 8 9 10 11 12 13 14 15 16 17 18 @RequestMapping(path = "/forget/password", method = RequestMethod.POST) public String resetPassword (String email, String verifyCode, String password, Model model, HttpSession session) {String code = (String) session.getAttribute("verifyCode" );if (StringUtils.isBlank(verifyCode) || StringUtils.isBlank(code) || !code.equalsIgnoreCase(verifyCode)) {"codeMsg" , "验证码错误!" );return "/site/forget" ;if (map.containsKey("user" )) {return "redirect:/login" ;else {"emailMsg" , map.get("emailMsg" ));"passwordMsg" , map.get("passwordMsg" ));return "/site/forget" ;
不同于之前激活账号成功是返回一个单独的网页 /site/operate-result
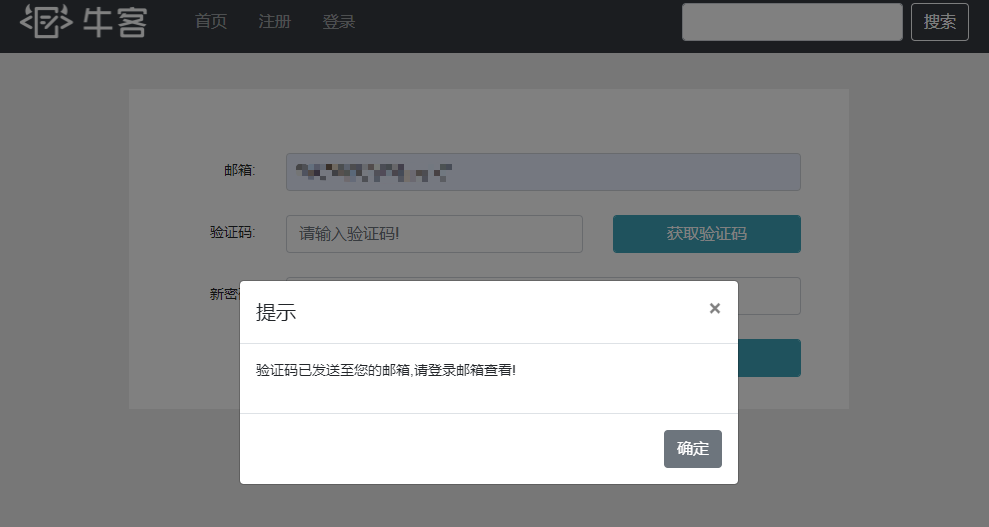
此处重置密码的提示使用js作为提示框,响应的前端文件forget.js之前也放入到工程里
至此忘记密码功能已经编写完成,后面可以自己测试
6. 显示登录信息
这一部分需要用到拦截器Interceptor的知识,前置知识笔记在Springmvc笔记里,同 Web开发中的 Filter 过滤器一样,对某一个功能前置加些功能,后置加些功能,显然是面向切面编程——AOP 的具体实现(底层是java的动态代理)
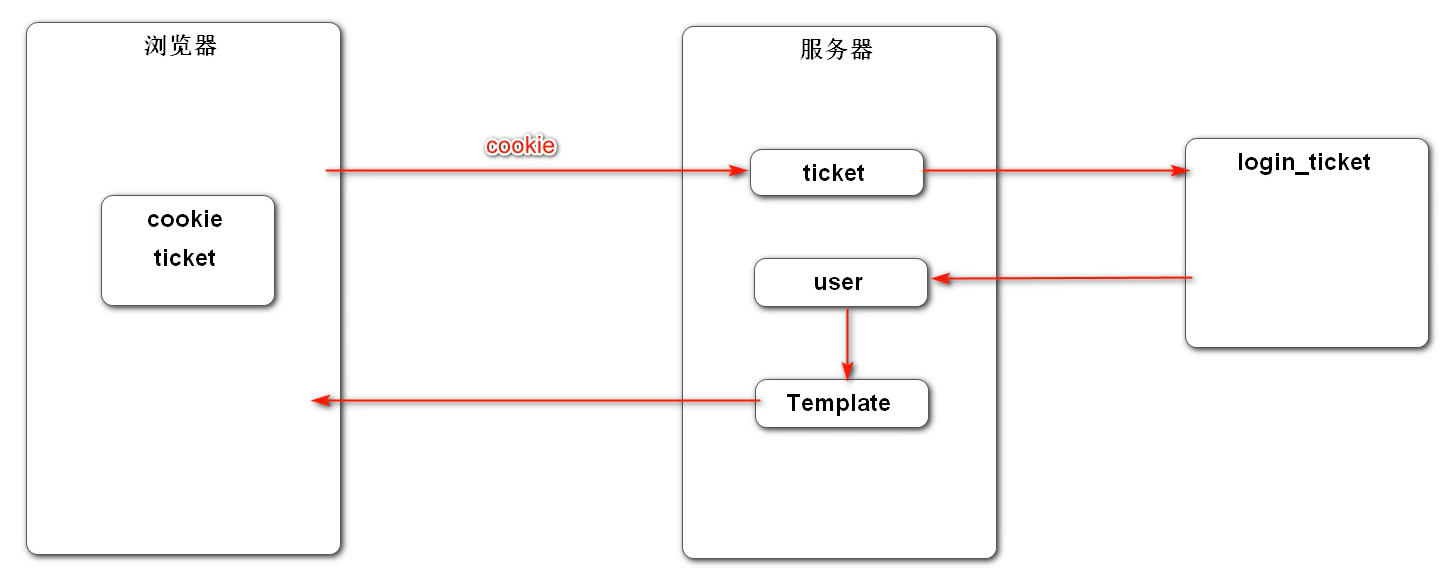
拦截器逻辑 首先根据前文的cookie梳理一下这个显示登录信息的逻辑:
浏览器第一次登录成功时,服务器会发送一个cookie存在浏览器本地,后来浏览器每次登录网站,即请求时都会把cookie带上,如图中的第一个红色箭头,服务器就会拿着这个cookie去前文的login_ticket表里去查找这个cookie,找到之后,表里关联了用户是谁,所以就能查找用户是谁,知道用户是谁就可以在模板引擎上展示和这个用户有关的信息了。
而且这个操作是每次请求和响应服务器都要做 的,就是说每次都要去查浏览器请求带过来的cookie,然后查到用户,在页面上显示出来。这样的操作应该使用拦截器,让mvc自动每次都做,而不是开发多次
这里也能进一步理解之前为什么要cookie而不是直接存用户名在浏览器和服务器上,因为用户名或者密码这种都是敏感信息,而存一个cookie就没那么敏感。
下面就是把上面的逻辑用代码开发出来
自定义拦截器类 在controller包下建立interceptor包,建立自定义拦截器LoginTicketInterceptor
1 2 @Component public class LoginTicketInterceptor implements HandlerInterceptor {}
显然是在每次的controller方法之前都要查找登录信息(即找到用户信息),所以要重写preHandle方法。
1 2 3 4 5 @Override public boolean preHandle (HttpServletRequest request, HttpServletResponse response, Object handler) throws Exception {return true ;
由于之后要多次从HttpServletRequest中获取cookie,在这里把它封装成工具的静态方法,在util包下创建CookieUtil类,用于获取cookie
1 2 3 4 5 6 7 8 9 10 11 12 13 14 15 16 17 18 public class CookieUtil {public static String getValue (HttpServletRequest request, String name) {if (request == null || name == null ) {throw new IllegalArgumentException ("参数为空!" );if (cookies != null ) {for (Cookie cookie : cookies) {if (cookie.getName().equals(name)) {return cookie.getValue();return null ;
接下来继续编写自定义拦截器的preHandle方法,先从cookie中查找名为“ticket”的用户登录凭证,再调用业务层方法根据这个ticket(先判断是否有效)找到用户。
此时有一个问题就是服务器是一对多的,有多个用户回来请求访问,服务器需要使用多个线程去响应浏览器的请求,这就要注意线程隔离问题,本来如果是把信息放在Session里,Session对象就是线程隔离的,但现在不想用Session对象,在util包下自定义HostHolder类,让他去持有用户信息,用于代替session对象。
1 2 3 4 5 6 7 8 9 10 11 12 13 14 15 16 17 18 19 20 21 @Component public class HostHolder {private ThreadLocal<User> users = new ThreadLocal <>();public void setUser (User user) {public User getUser () {return users.get(); public void clear () {
至此,完整的preHandle方法就开发结束
1 2 3 4 5 6 7 8 9 10 11 12 13 14 15 16 17 18 19 @Override public boolean preHandle (HttpServletRequest request, HttpServletResponse response, Object handler) throws Exception {String ticket = CookieUtil.getValue(request, "ticket" );if (ticket != null ) {LoginTicket loginTicket = userService.findLoginTicket(ticket);if (loginTicket != null && loginTicket.getStatus() == 0 && loginTicket.getExpired().after(new Date ())) {User user = userService.findUserById(loginTicket.getUserId());return true ;
后面我们需要在模板引擎渲染视图之前,用这个取到的用户对象,把对象存到modelAndView里,再来渲染页面,所以这里要重写拦截器的postHandle方法,该方法是在controller方法之后,渲染页面之前调用的。
postHandle方法内部很简单,获取当前线程里的用户然后添加进modelAndView就行
1 2 3 4 5 6 7 @Override public void postHandle (HttpServletRequest request, HttpServletResponse response, Object handler, ModelAndView modelAndView) throws Exception {User user = hostHolder.getUser(); if (user != null && modelAndView != null ) {"loginUser" , user);
在请求结束之后,我们需要将持有用户信息的对象HostHolder清空,要不然光存不清理,占用资源。这个方法应该写在渲染页面结束之后,所以要重写afterCompletion方法
1 2 3 4 @Override public void afterCompletion (HttpServletRequest request, HttpServletResponse response, Object handler, Exception ex) throws Exception {
至此,自定义的拦截器类以及方法已经写完,下一步是将他注册到springmvc里
配置拦截器 在config包里创建WebMvcConfig类,实现WebMvcConfigurer接口,加上@Configuration注解,类里注入自定义的拦截器类,并将其加入到mvc的拦截器列表中
1 2 3 4 5 6 7 8 9 10 11 @Configuration public class WebMvcConfig implements WebMvcConfigurer {@Autowired private LoginTicketInterceptor loginTicketInterceptor;@Override public void addInterceptors (InterceptorRegistry registry) {"/**/*.css" , "/**/*.js" , "/**/*.png" , "/**/*.jpg" , "/**/*.jpeg" );
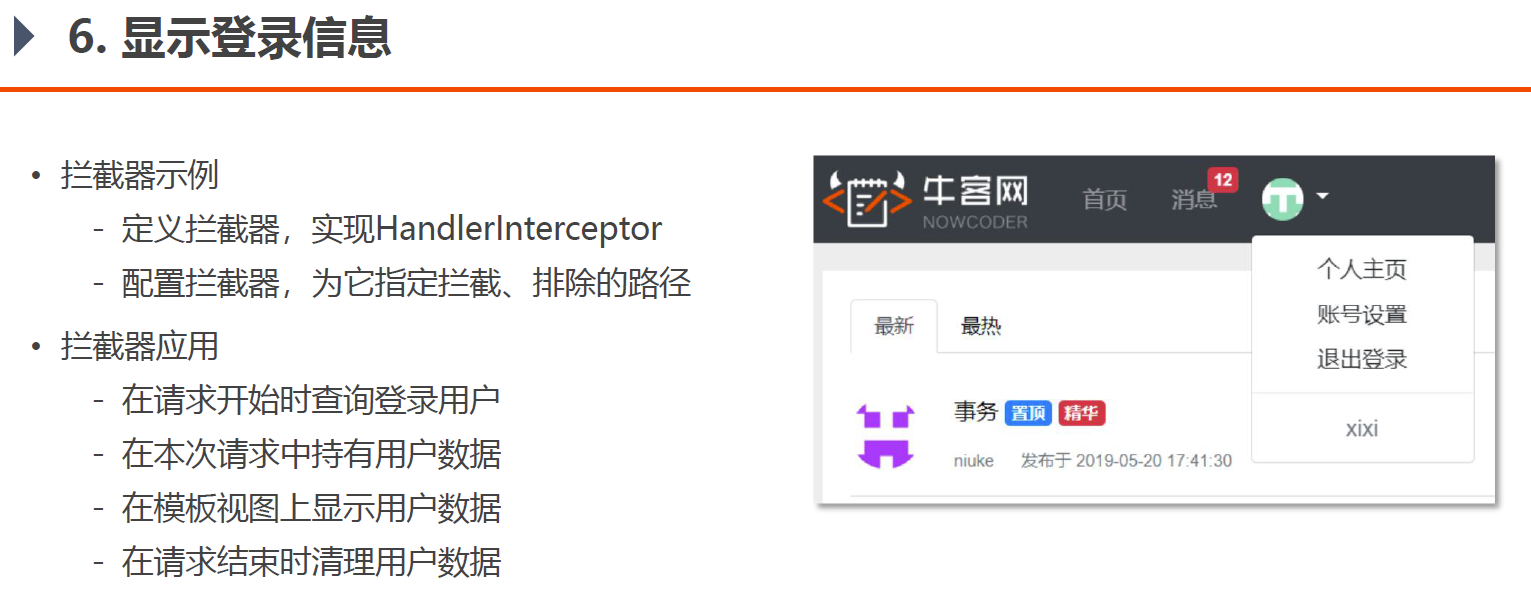
前端和测试 下一步就是让模板引擎去根据登录信息渲染页面,这一部分看对应视频的48:35内容,不记录了,总之就是让index.html根据登录信息显示不同的内容
运行程序,未登录前,index.html头部显示如下
账号wanyu,密码123,登陆后,index.html头部显示如下
退出登录后,返回未登陆前的页面(退出登陆后登陆凭证的状态设为了1,表示无效)
7. 开发账号设置
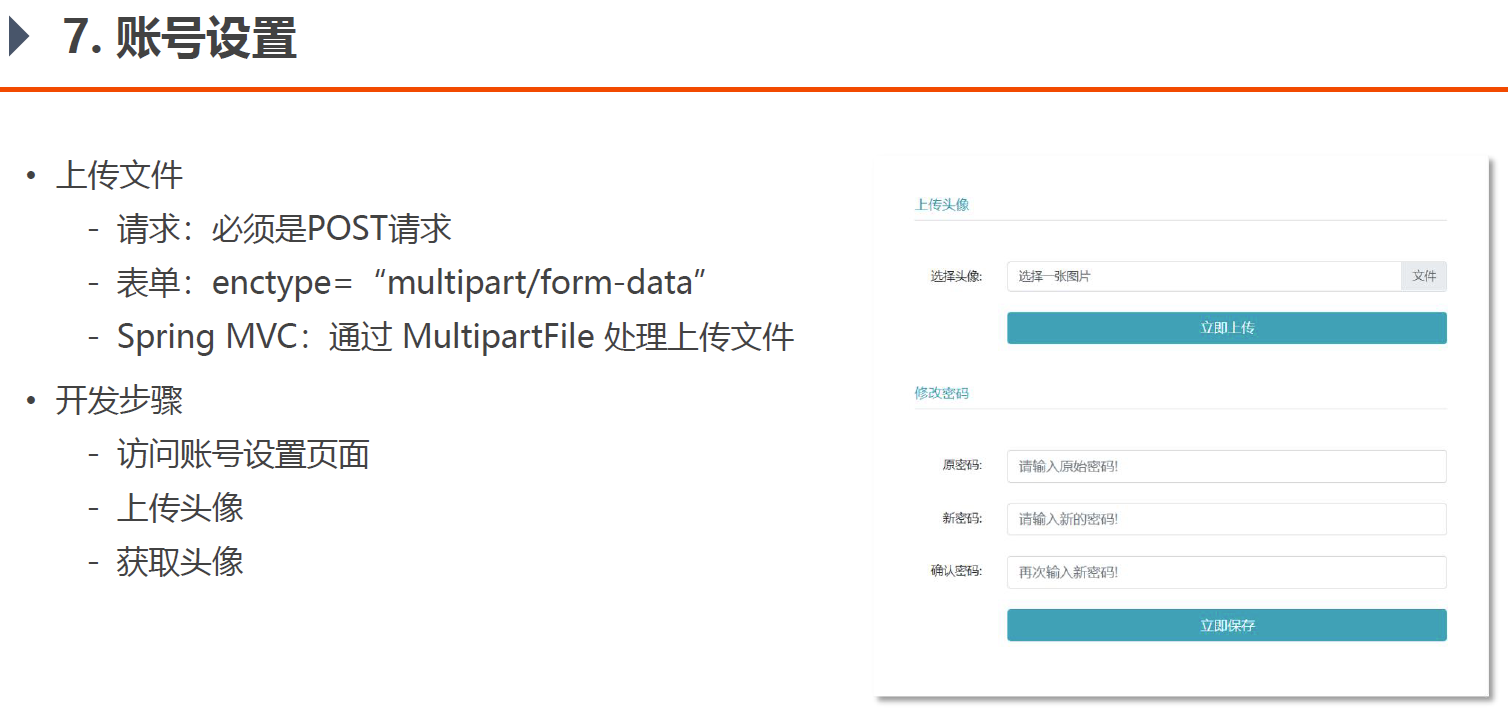
用户登陆之后,需要对自己的账户可以进行设置,此处实现上传头像和修改密码两个功能
访问账号设置页面 在controller包里创建UserController类,这是属于用户的表现层,写在现有的controller类里不合适,编写基本的返回页面功能
1 2 3 4 5 6 7 8 9 @Controller @RequestMapping("/user") public class UserController {@RequestMapping(path = "/setting", method = RequestMethod.GET) public String getSettingPage () {return "/site/setting" ;
随后修改前端文件,主要是将setting.html改为thymeleaf模板,在index.html中将账号设置改为返回页面
1 <a class ="dropdown-item text-center" th:href ="@{/user/setting}" > 账号设置</a >
随后就可以进行测试了,访问index登录后,进到账号设置页面,看是否能够进入成功
上传图像 上传文件是本节的核心功能,最好是学过基本的上传文件步骤再来做这个开发
第一步自然是设置图像上传位置,在项目配置文件里加入
1 community.path.upload =D:/codework/Java/IDEA/Other/Community_upload
随后依然是三层架构的开发。
数据层 无
业务层 业务层的改变也很小,只需要把用户表里的图像url给改了
1 2 3 4 public int updateHeader (int userId, String headerUrl) {return userMapper.updateHeader(userId, headerUrl);
表现层 主要在表现层使用Springmvc的 MultipartFile 处理上传文件
在处理前注入:本项目域名、上传地址、项目名、业务层对象、当前用户
1 2 3 4 5 6 7 8 9 10 11 12 13 14 15 16 17 18 @Controller @RequestMapping("/user") public class UserController {@Value("${community.path.upload}") private String uploadPath;@Value("${community.path.domain}") private String domain;@Value("${server.servlet.context-path}") private String contextPath;@Autowired private UserService userService;@Autowired private HostHolder hostHolder;
上传文件是使用Springmvc提供的MultipartFile,他要求请求方式必须是POST,同时为了添加一些信息,也将Model作为参数。剩下的逻辑看注释即可
1 2 3 4 5 6 7 8 9 10 11 12 13 14 15 16 17 18 19 20 21 22 23 24 25 26 27 28 29 30 31 32 33 34 35 @RequestMapping(path = "/upload", method = RequestMethod.POST) public String uploadHeader (MultipartFile headerImage, Model model) {if (headerImage == null ) {"error" , "您还没有选择图片!" );return "/site/setting" ; String fileName = headerImage.getOriginalFilename(); String suffix = fileName.substring(fileName.lastIndexOf("." )); if (StringUtils.isBlank(suffix)) { "error" , "文件的格式不正确!" );return "/site/setting" ;File dest = new File (uploadPath + "/" + fileName);try {catch (IOException e) {"上传文件失败: " + e.getMessage());throw new RuntimeException ("上传文件失败,服务器发生异常!" , e);User user = hostHolder.getUser();String headerUrl = domain + contextPath + "/user/header/" + fileName;return "redirect:/index" ;
逻辑上需要注意的是,我们不能直接从服务器上的路径读取文件到浏览器上,而是有一个转换的过程,这就是下面的获取头像。通过字节流读取服务器磁盘路径上的图片,再通过字节流写入到response响应中
获取头像 获取头像就是根据之前上传头像更新的web访问路径,去加载头像图片
这个方法的返回值定义为void,因为只是加载图片,是以流的形式加载,不需要返回东西
1 2 3 4 5 6 7 8 9 10 11 12 13 14 15 16 17 18 19 20 21 @RequestMapping(path = "/header/{fileName}", method = RequestMethod.GET) public void getHeader (@PathVariable("fileName") String fileName, HttpServletResponse response) {"/" + fileName;String suffix = fileName.substring(fileName.lastIndexOf("." ));"image/" + suffix);try ( FileInputStream fis = new FileInputStream (fileName); OutputStream os = response.getOutputStream(); byte [] buffer = new byte [1024 ]; int b = 0 ;while ((b = fis.read(buffer)) != -1 ) {0 , b);catch (IOException e) {"读取头像失败: " + e.getMessage());
前端和测试 对应视频的37:30看前端怎么写的,此处略过。
测试很简单,登录进去,账号设置,上传图片即可,上传成功会回到首页并更新头像
这个时候上传文件路径里应该有上传的图片,用户数据表里会更新头像图片路径
修改密码 这部分功能是课后作业,逻辑上比较简单,也没有新东西,直接贴代码了
业务层:UserService
1 2 3 4 5 6 7 8 9 10 11 12 13 14 15 16 17 18 19 20 21 22 23 24 25 26 27 28 public Map<String, Object> updatePassword (int userId, String oldPassword, String newPassword) {new HashMap <>();if (StringUtils.isBlank(oldPassword)) {"oldPasswordMsg" , "原密码不能为空!" );return map;if (StringUtils.isBlank(newPassword)) {"newPasswordMsg" , "新密码不能为空!" );return map;User user = userMapper.selectById(userId);if (!user.getPassword().equals(oldPassword)) {"oldPasswordMsg" , "原密码输入有误!" );return map;return map;
表现层:UserController
1 2 3 4 5 6 7 8 9 10 11 12 13 @RequestMapping(path = "/updatePassword", method = RequestMethod.POST) public String updatePassword (String oldPassword, String newPassword, Model model) {User user = hostHolder.getUser();if (map == null || map.isEmpty()) {return "redirect:/logout" ;else {"oldPasswordMsg" , map.get("oldPasswordMsg" ));"newPasswordMsg" , map.get("newPasswordMsg" ));return "/site/setting" ;
8. 检查登陆状态
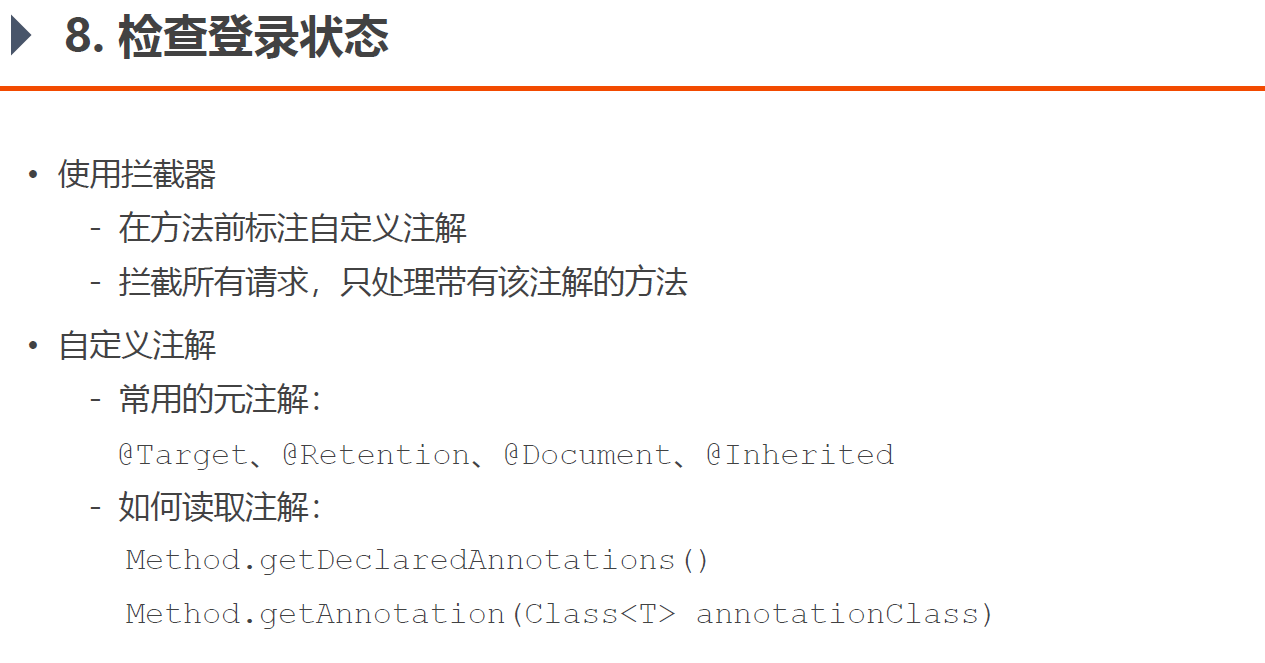
之前显示登陆信息一节利用拦截器区分了登录状态,未登录显示首页,有注册、登录按钮,登陆后显示首页、消息和头像等信息,但也只是根据登陆状态判断是否显示这些按钮,事实上我们还应该从根本解决问题,根据登陆状态去判断哪些请求可以访问,哪些请求不会访问。
比如在未登录状态下,我知道账号设置的url是http://localhost:8080/community/user/setting,那我就可以直接访问了,这显示不合理的,会造成很多安全问题。所以需要检查登陆状态,使用拦截器区分哪些请求在登录状态下才可以响应,哪些请求未登录时是不能响应的
这里换一种实现方式,不在拦截器配置里用excludePathPatterns或者addPathPatterns了,而是自定义一个注解@LoginRequired,加了该注解的请求,是需要登陆状态才让服务器响应的,没有加该注解的请求,未登录状态服务器也可以响应请求
新建自定义注解 新建annotation包,创建注解@LoginRequired
1 2 3 4 @Target(ElementType.METHOD) @Retention(RetentionPolicy.RUNTIME) public @interface LoginRequired {
那么目前的请求方法里,有以下需要登录后才能让响应的请求,分别给他们加上注解@LoginRequired:
(1)返回账号设置页面的请求
1 2 3 @LoginRequired @RequestMapping(path = "/setting", method = RequestMethod.GET) public String getSettingPage () {}
(2)上传头像图片的请求
1 2 3 @LoginRequired @RequestMapping(path = "/upload", method = RequestMethod.POST) public String uploadHeader (MultipartFile headerImage, Model model) {}
注意读取头像图片的请求是不用登录状态的,因为我在首页未登录时候也可以查看别人的头像
自定义拦截器 下面就要编写一个拦截器能够拦截那些加了@LoginRequired注解的请求,只有登陆状态才能响应请求,编写LoginRequiredInterceptor文件,重写preHandle方法,因为肯定是在请求之前拦截,如何判断是否是登陆状态,注入HostHolder看是否能够获取到对象即可,能够获取到说明登录成功,其他的逻辑见注释
1 2 3 4 5 6 7 8 9 10 11 12 13 14 15 16 17 18 19 20 21 22 23 @Component public class LoginRequiredInterceptor implements HandlerInterceptor {@Autowired private HostHolder hostHolder; @Override public boolean preHandle (HttpServletRequest request, HttpServletResponse response, Object handler) throws Exception {if (handler instanceof HandlerMethod) {HandlerMethod handlerMethod = (HandlerMethod) handler;Method method = handlerMethod.getMethod(); LoginRequired loginRequired = method.getAnnotation(LoginRequired.class); if (loginRequired != null && hostHolder.getUser() == null ) {"/login" ); return false ; return true ;
配置拦截器 将自定义的拦截器配置到mvc里,和之前的拦截器一样,我们希望他不要拦截静态资源浪费时间,而是拦截所有的动态请求
1 2 3 4 5 6 7 8 9 10 11 12 13 14 15 16 17 @Configuration public class WebMvcConfig implements WebMvcConfigurer {@Autowired private LoginTicketInterceptor loginTicketInterceptor;@Autowired private LoginRequiredInterceptor loginRequiredInterceptor;@Override public void addInterceptors (InterceptorRegistry registry) {"/**/*.css" , "/**/*.js" , "/**/*.png" , "/**/*.jpg" , "/**/*.jpeg" );"/**/*.css" , "/**/*.js" , "/**/*.png" , "/**/*.jpg" , "/**/*.jpeg" );
测试 现在未登录状态下,去访问账号设置的urlhttp://localhost:8080/community/user/setting,会重定向到登陆页面,这样才是安全合理的
三、SpringBoot进阶:开发社区核心功能 1. 过滤敏感词 本节使用前缀树Trie过滤敏感词
首先在resources文件夹下创建敏感词文件sensitive-words.txt,编写敏感词,一个词一行
后面编写敏感词过滤器工具类,这部分涉及到很多前缀树的数据结构知识,不做过多的说明,代码也不贴了,去项目工程文件里看就可以,基本就是常见的前缀树操作。不过敏感词的匹配和替换用到了三个指针的思想,那段代码以前没写过,有一定的难度,有空可以自己再写写画画
测试环节在test里进行过测试,可以实现过滤敏感词的功能
更新:这部分代码可能有bug,详细见牛客对应课程讨论区
2. 发布帖子 AJAX(Asynchronous JavaScript and XML),异步的JavaScript与XML,不是一门新技术,只是一个新的术语。使用AJAX,网页能够将增量更新呈现在页面上,而不需要刷新整个页面。虽然X代表XML,但目前JSON的使用比XML更加普遍
本项目使用js框架jQuery来发送AJAX请求
首先在CommunityUtil类里编写JSON格式字符串处理的代码,后面会经常用到,这里引入一个新的依赖,fastjson,它的效率更高
1 2 3 4 5 6 7 8 9 10 11 12 13 14 15 16 17 18 19 20 public static String getJSONString (int code, String msg, Map<String, Object> map) {JSONObject json = new JSONObject ();"code" , code);"msg" , msg);if (map != null ) {for (String key : map.keySet()) {return json.toJSONString();public static String getJSONString (int code, String msg) {return getJSONString(code, msg, null );public static String getJSONString (int code) {return getJSONString(code, null , null );
下面就是按照三层架构去编写发布帖子功能
(1)数据访问层
在DiscussPostMapper写一个增加帖子的方法,并在对应的mapper.xml文件编写sql语句
1 2 int insertDiscussPost (DiscussPost discussPost) ;
1 2 3 4 <insert id ="insertDiscussPost" parameterType ="DiscussPost" > <include refid ="insertFields" > </include > )</insert >
(2)业务层
在DiscussPostService写业务层增加帖子的代码,这里用到前一个小节的敏感词过滤方法
1 2 3 4 5 6 7 8 9 10 11 12 13 14 15 public int addDiscussPost (DiscussPost post) {if (post == null ) {throw new IllegalArgumentException ("参数不能为空!" );return discussPostMapper.insertDiscussPost(post);
(3)表现层
这里新建一个DiscussPostController用于专门处理有关帖子的请求
1 2 3 4 5 6 7 8 9 10 11 12 13 14 15 16 17 18 19 20 21 22 23 24 25 26 27 28 29 30 31 32 @Controller @RequestMapping("/discuss") public class DiscussPostController {@Autowired private DiscussPostService discussPostService;@Autowired private HostHolder hostHolder;@RequestMapping(path = "/add", method = RequestMethod.POST) @ResponseBody public String addDiscussPost (String title, String content) { User user = hostHolder.getUser();if (user == null ) {return CommunityUtil.getJSONString(403 , "你还没有登录哦!" );DiscussPost post = new DiscussPost ();new Date ());return CommunityUtil.getJSONString(0 , "发布成功!" );
(4)前端
主要是编写用于发送异步请求的ajax,index.js
1 2 3 4 5 6 7 8 9 10 11 12 13 14 15 16 17 18 19 20 21 22 23 24 25 26 27 28 29 30 31 $(function ("#publishBtn" ).click (publish);function publish ("#publishModal" ).modal ("hide" );var title = $("#recipient-name" ).val ();var content = $("#message-text" ).val ();post (CONTEXT_PATH + "/discuss/add" ,"title" :title,"content" :content},function (data ) {parseJSON (data);"#hintBody" ).text (data.msg );"#hintModal" ).modal ("show" );setTimeout (function ("#hintModal" ).modal ("hide" );if (data.code == 0 ) {window .location .reload ();2000 );
(5)测试
分别发布正常的帖子,和带html标签、敏感词的帖子进行测试。
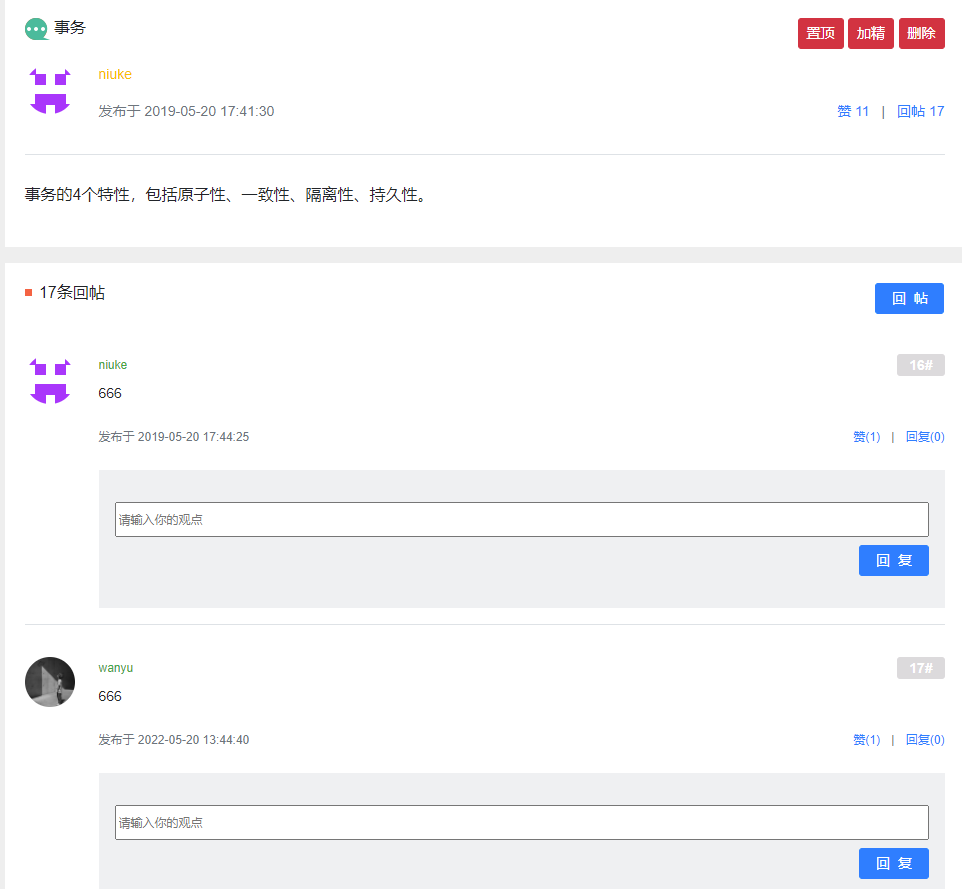
3. 帖子详情 查看每个发布帖子的详情页面,按照三层架构开发即可
(1)数据访问层,DiscussPostMapper
1 DiscussPost selectDiscussPostById (int id) ;
1 2 3 4 5 <select id ="selectDiscussPostById" resultType ="DiscussPost" > <include refid ="selectFields" > </include > </select >
(2)业务层,DiscussPostService
1 2 3 public DiscussPost findDiscussPostById (int id) {return discussPostMapper.selectDiscussPostById(id);
(3)表现层,DiscussPostController
1 2 3 4 5 6 7 8 9 10 11 12 13 14 @RequestMapping(path = "/detail/{discussPostId}", method = RequestMethod.GET) public String getDiscussPost (@PathVariable("discussPostId") int discussPostId, Model model) {DiscussPost post = discussPostService.findDiscussPostById(discussPostId);"post" , post);User user = userService.findUserById(post.getUserId());"user" , user);return "/site/discuss-detail" ;
(4)前端
更改index.html和discuss-detail.html
(5)测试
4. 事务管理 此部分为前置知识,不涉及项目具体开发
5. 显示评论
依然是按照三层架构进行开发
(1)数据访问层
先创建comment的实体
1 2 3 4 5 6 7 8 9 10 11 12 public class Comment {private int id;private int userId;private int entityType; private int entityId; private int targetId; private String content;private int status;private Date createTime;
再创建数据访问层CommentMapper以及对应的mapper.xml
1 2 3 4 5 6 7 @Mapper public interface CommentMapper {selectCommentsByEntity (int entityType, int entityId, int offset, int limit) ;int selectCountByEntity (int entityType, int entityId) ;
1 2 3 4 5 6 7 8 9 10 11 12 13 14 15 16 17 18 19 20 21 <sql id ="selectFields" > </sql > <select id ="selectCommentsByEntity" resultType ="Comment" > <include refid ="selectFields" > </include > </select > <select id ="selectCountByEntity" resultType ="int" > </select >
(2)业务层
1 2 3 4 5 6 7 8 9 10 11 12 13 14 @Service public class CommentService {@Autowired private CommentMapper commentMapper;public List<Comment> findCommentsByEntity (int entityType, int entityId, int offset, int limit) {return commentMapper.selectCommentsByEntity(entityType, entityId, offset, limit);public int findCommentCount (int entityType, int entityId) {return commentMapper.selectCountByEntity(entityType, entityId);
(3)表现层
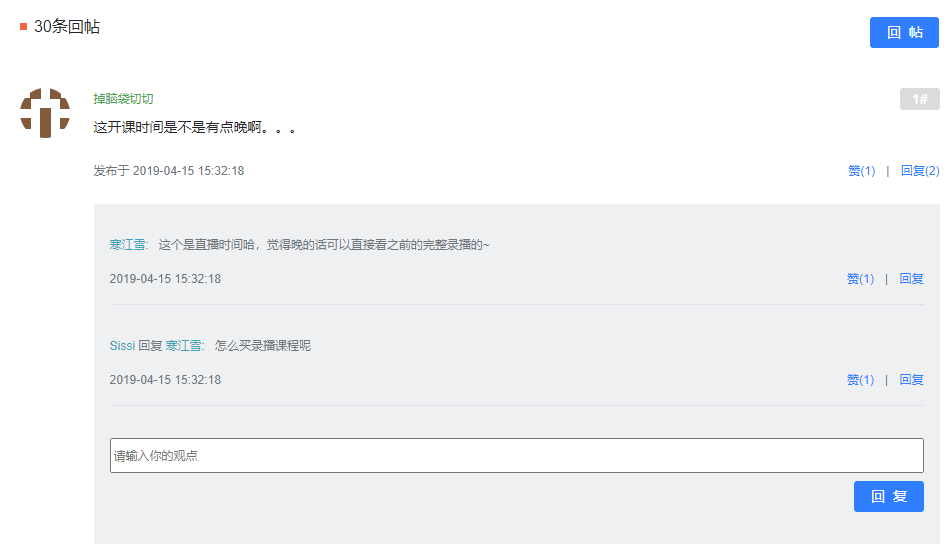
由于是在帖子详情页面下面加载评论,在之前开发的表现层文件继续开发,DiscussPostController,逻辑和细节见注释
1 2 3 4 5 6 7 8 9 10 11 12 13 14 15 16 17 18 19 20 21 22 23 24 25 26 27 28 29 30 31 32 33 34 35 36 37 38 39 40 41 42 43 44 45 46 47 48 49 50 51 52 53 54 55 56 57 58 59 60 61 62 63 64 65 66 67 @RequestMapping(path = "/detail/{discussPostId}", method = RequestMethod.GET) public String getDiscussPost (@PathVariable("discussPostId") int discussPostId, Model model, Page page) {DiscussPost post = discussPostService.findDiscussPostById(discussPostId);"post" , post);User user = userService.findUserById(post.getUserId());"user" , user);5 );"/discuss/detail/" + discussPostId);new ArrayList <>();if (commentList != null ) {for (Comment comment : commentList) {new HashMap <>();"comment" , comment);"user" , userService.findUserById(comment.getUserId()));0 , Integer.MAX_VALUE); new ArrayList <>();if (replyList != null ) {for (Comment reply : replyList) {new HashMap <>();"reply" , reply);"user" , userService.findUserById(reply.getUserId()));User target = reply.getTargetId() == 0 ? null : userService.findUserById(reply.getTargetId());"target" , target);"replys" , replyVoList);int replyCount = commentService.findCommentCount(ENTITY_TYPE_COMMENT, comment.getId());"replyCount" , replyCount);"comments" , commentVoList);return "/site/discuss-detail" ;
(4)前端
前端页面要调的东西比较多,不详细写了。替换代码里的index.html 和 discuss-detail.html
(5)测试
访问首页的帖子进行测试
6. 添加评论 三层架构开发
(1)数据层
增加评论数据,CommentMapper
1 2 int insertComment (Comment comment) ;
1 2 3 4 <insert id ="insertComment" parameterType ="Comment" > <include refid ="insertFields" > </include > )</insert >
更新帖子的评论数量,DiscussPostMapper
1 2 int updateCommentCount (int id, int commentCount) ;
1 2 3 <update id ="updateCommentCount" > </update >
(2)业务层
处理添加评论的业务,先增加评论,需要用到事务管理。CommentService
1 2 3 4 5 6 7 8 9 10 11 12 13 14 15 16 17 18 19 20 @Transactional(isolation = Isolation.READ_COMMITTED, propagation = Propagation.REQUIRED) public int addComment (Comment comment) {if (comment == null ) {throw new IllegalArgumentException ("参数不能为空!" );int rows = commentMapper.insertComment(comment);if (comment.getEntityType() == ENTITY_TYPE_POST) {int count = commentMapper.selectCountByEntity(comment.getEntityType(), comment.getEntityId());return rows;
再更新帖子的评论数量,DiscussPostService
1 2 3 4 public int updateCommentCount (int id, int commentCount) {return discussPostMapper.updateCommentCount(id, commentCount);
(3)表现层
处理添加评论数据的请求。设置添加评论的表单。
1 2 3 4 5 6 7 8 9 10 11 12 13 14 15 16 17 18 19 20 21 @Controller @RequestMapping("/comment") public class CommentController {@Autowired private CommentService commentService;@Autowired private HostHolder hostHolder;@RequestMapping(path = "/add/{discussPostId}", method = RequestMethod.POST) public String addComment (@PathVariable("discussPostId") int discussPostId, Comment comment) {0 );new Date ());return "redirect:/discuss/detail/" + discussPostId;
(4)前端和测试
更改discuss-detail.html
进行测试
7. 私信列表 私信列表:查询当前用户的会话列表,每个会话只显示一条最新的私信,支持分页显示。
私信详情:查询某个会话所包含的私信,支持分页显示
(1)数据层
封装消息的实体类
1 2 3 4 5 6 7 8 9 10 11 public class Message {private int id;private int fromId; private int toId;private String conversationId; private String content;private int status; private Date createTime;
mapper类及其sql语句,MessageMapper。这里的sql语句都值得反复理解,比较复杂
1 2 3 4 5 6 7 8 9 10 11 12 13 14 15 16 17 18 19 @Mapper public interface MessageMapper {selectConversations (int userId, int offset, int limit) ;int selectConversationCount (int userId) ;selectLetters (String conversationId, int offset, int limit) ;int selectLetterCount (String conversationId) ;int selectLetterUnreadCount (int userId, String conversationId) ;
1 2 3 4 5 6 7 8 9 10 11 12 13 14 15 16 17 18 19 20 21 22 23 24 25 26 27 28 29 30 31 32 33 34 35 36 37 38 39 40 41 42 43 44 45 46 47 48 49 50 51 52 53 54 55 56 57 58 59 60 <mapper namespace ="com.wanyu.community.dao.MessageMapper" > <sql id ="selectFields" > </sql > <select id ="selectConversations" resultType ="Message" > <include refid ="selectFields" > </include > </select > <select id ="selectConversationCount" resultType ="int" > </select > <select id ="selectLetters" resultType ="Message" > <include refid ="selectFields" > </include > </select > <select id ="selectLetterCount" resultType ="int" > </select > <select id ="selectLetterUnreadCount" resultType ="int" > <if test ="conversationId!=null" > </if > </select > </mapper >
在进行业务层开发之前可以先进行一下测试
(2)业务层
就是调用数据访问层,没有其他特殊的业务逻辑
1 2 3 4 5 6 7 8 9 10 11 12 13 14 15 16 17 18 19 20 21 22 23 24 25 @Service public class MessageService {@Autowired private MessageMapper messageMapper;public List<Message> findConversations (int userId, int offset, int limit) {return messageMapper.selectConversations(userId, offset, limit);public int findConversationCount (int userId) {return messageMapper.selectConversationCount(userId);public List<Message> findLetters (String conversationId, int offset, int limit) {return messageMapper.selectLetters(conversationId, offset, limit);public int findLetterCount (String conversationId) {return messageMapper.selectLetterCount(conversationId);public int findLetterUnreadCount (int userId, String conversationId) {return messageMapper.selectLetterUnreadCount(userId, conversationId);
(3)表现层
私信列表
1 2 3 4 5 6 7 8 9 10 11 12 13 14 15 16 17 18 19 20 21 22 23 24 25 26 27 28 29 30 31 32 33 34 35 36 37 38 39 40 41 42 43 44 45 46 47 @Controller public class MessageController {@Autowired private MessageService messageService;@Autowired private HostHolder hostHolder;@Autowired private UserService userService;@RequestMapping(path = "/letter/list", method = RequestMethod.GET) public String getLetterList (Model model, Page page) {User user = hostHolder.getUser();5 );"/letter/list" );new ArrayList <>();if (conversationList != null ) {for (Message message : conversationList) {new HashMap <>();"conversation" , message); "letterCount" , messageService.findLetterCount(message.getConversationId())); "unreadCount" , messageService.findLetterUnreadCount(user.getId(), message.getConversationId())); int targetId = user.getId() == message.getFromId() ? message.getToId() : message.getFromId(); "target" , userService.findUserById(targetId)); "conversations" , conversations);int letterUnreadCount = messageService.findLetterUnreadCount(user.getId(), null );"letterUnreadCount" , letterUnreadCount);return "/site/letter" ;
私信详情
(4)前端测试
替换index.html、letter.html、
测试账号:aaa ,密码:aaa
查看私信列表和详情
8. 发送私信 (1)数据访问层,MessageMapper
1 2 3 4 5 int insertMessage (Message message) ;int updateStatus (List<Integer> ids, int status) ;
1 2 3 4 5 6 7 8 9 10 11 12 <insert id ="insertMessage" parameterType ="Message" keyProperty ="id" > <include refid ="insertFields" > </include > )</insert > <update id ="updateStatus" > <foreach collection ="ids" item ="id" open ="(" separator ="," close =")" > </foreach > </update >
(2)业务层,MessageService
1 2 3 4 5 6 7 8 9 10 11 public int addMessage (Message message) {return messageMapper.insertMessage(message);public int readMessage (List<Integer> ids) {return messageMapper.updateStatus(ids, 1 );
(3)表现层
1 2 3 4 5 6 7 8 9 10 11 12 13 14 15 16 17 18 19 20 21 22 23 24 25 26 27 28 29 30 31 32 33 34 35 36 37 38 39 40 41 42 43 44 45 46 47 48 49 50 51 52 @RequestMapping(path = "/letter/send", method = RequestMethod.POST) @ResponseBody public String sendLetter (String toName, String content) {User target = userService.findUserByName(toName);if (target == null ) {return CommunityUtil.getJSONString(1 , "目标用户不存在!" );Message message = new Message ();if (message.getFromId() < message.getToId()) {"_" + message.getToId());else {"_" + message.getFromId());new Date ());return CommunityUtil.getJSONString(0 );private List<Integer> getLetterIds (List<Message> letterList) {new ArrayList <>();if (letterList != null ) {for (Message message : letterList) {if (hostHolder.getUser().getId() == message.getToId() && message.getStatus() == 0 ) { return ids;@RequestMapping(path = "/letter/detail/{conversationId}", method = RequestMethod.GET) public String getLetterDetail (@PathVariable("conversationId") String conversationId, Page page, Model model) {if (!ids.isEmpty()) {
(4)前端和测试
更新letter-detail.html、letter.html、letter.js
测试:用账号aaa(密码aaa)给wanyu(密码123)发送两条消息,再登录wanyu,检测消息是否发送成功,以及未读已读状态
9. 统一处理异常 按照三层架构的开发逻辑,所有的异常都会抛到表现层,所以在表现层进行统一处理异常即可
(1)Springboot
SpringBoot处理异常的页面很简单,只要按照目录:Resources-templates-error放置对应错误码的页面即可
更新404.html 500.html,在messageController随便造个语法错误
测试:
随便访问一个不存在的路径,会显示如下页面
访问私信列表,随便访问一个不存在的路径(前提是在messageController造个语法错误)
(2)Spring
前面介绍的处理异常方式处理的过于简单,我们在服务器发生异常时,希望记录异常日志。Spring里也提供了更丰富的统一异常处理机制,就是使用注解 @ControllerAdvice,它用于修饰类,表示该类是Controller的全局配置类。在此类中,可以对Controller进行如下三种全局配置:异常处理方案、绑定数据方案、绑定参数方案。
@ExceptionHandler
用于修饰方法,该方法会在Controller出现异常后被调用,用于处理捕获到的异常。
@ModelAttribute
用于修饰方法,该方法会在Controller方法执行前被调用,用于为Model对象绑定参数。
@DataBinder
用于修饰方法,该方法会在Controller方法执行前被调用,用于绑定参数的转换器。
此处主要用到第1个
首先在HomeController里配置error的访问请求,方便其他方法进行重定向
1 2 3 4 @RequestMapping(path = "/error", method = RequestMethod.GET) public String getErrorPage () {return "/error/500" ;
然后在controller里新建advice-ExceptionAdvice
1 2 3 4 5 6 7 8 9 10 11 12 13 14 15 16 17 18 19 20 21 @Slf4j @ControllerAdvice(annotations = Controller.class) public class ExceptionAdvice {@ExceptionHandler({Exception.class}) public void handleException (Exception e, HttpServletRequest request, HttpServletResponse response) throws IOException {"服务器发生异常: " + e.getMessage());for (StackTraceElement element : e.getStackTrace()) {String xRequestedWith = request.getHeader("x-requested-with" );if ("XMLHttpRequest" .equals(xRequestedWith)) {"application/plain;charset=utf-8" );PrintWriter writer = response.getWriter();1 , "服务器异常!" ));else { "/error" );
后面可以进行测试,随便模拟几个错误,看看后台日志打印情况即可
10. 统一记录日志 这部分需要Spring的AOP前置知识,建议学习后再来对这部分进行开发
记录日志属于整个系统的需求,如果我需要给每个业务记录日志,总不能在每个业务代码里编写记录日志的代码。这样就将业务代码和系统需求耦合在了一起,所以这里就需要用到AOP的思想。
使用AOP可以对每个业务模块例如:帖子、评论、消息模块,都进行统一的系统需求,比如:权限检查、记录日志、事务管理。
新建aspect包,编写记录日志代码,ServiceLogAspect
1 2 3 4 5 6 7 8 9 10 11 12 13 14 15 16 17 18 19 20 21 22 23 24 @Slf4j @Component @Aspect public class ServiceLogAspect {@Pointcut("execution(* com.nowcoder.community.service.*.*(..))") public void pointcut () {@Before("pointcut()") public void before (JoinPoint joinPoint) {ServletRequestAttributes attributes = (ServletRequestAttributes) RequestContextHolder.getRequestAttributes();HttpServletRequest request = attributes.getRequest();String ip = request.getRemoteHost();String now = new SimpleDateFormat ("yyyy-MM-dd HH:mm:ss" ).format(new Date ());String target = joinPoint.getSignature().getDeclaringTypeName() + "." + joinPoint.getSignature().getName();"用户[%s],在[%s],访问了[%s]." , ip, now, target));
四、Redis,一站式高性能存储方案 Redis是一款基于键值对的NoSQL数据库,它的值支持多种数据结构。Redis将所有的数据都存放在内存中,所以它的读写性能十分惊人。同时,Redis还可以将内存中的数据以快照或日志的形式保存到硬盘上,以保证数据的安全性。Redis典型的应用场景包括:缓存、排行榜、计数器、社交网络、消息队列等。
本项目使用Redis,按照如下步骤:
1. 点赞功能 功能要求:
点赞
支持对帖子、评论点赞。
第1次点赞,第2次取消点赞。
首页点赞数量
详情页点赞数量
Redis由于操作数据访问层比较简单,不用额外编写类文件,直接编写业务层代码即可,由于我们主要对 key 进行操作,先写一个生成 key 的工具类,方便复用
注意这里用集合 去存谁点了赞,而不是简单的计数,
并且后面需求如果变化看谁点了赞就没办法了
1 2 3 4 5 6 7 8 9 public class RedisKeyUtil {private static final String SPLIT = ":" ;private static final String PREFIX_ENTITY_LIKE = "like:entity" ;public static String getEntityLikeKey (int entityType, int entityId) {return PREFIX_ENTITY_LIKE + SPLIT + entityType + SPLIT + entityId;
业务层
业务层代码,逻辑都比较简单,看注释即可
1 2 3 4 5 6 7 8 9 10 11 12 13 14 15 16 17 18 19 20 21 22 23 24 25 26 27 28 29 30 31 @Service public class LikeService {@Autowired private RedisTemplate redisTemplate;public void like (int userId, int entityType, int entityId) {String entityLikeKey = RedisKeyUtil.getEntityLikeKey(entityType, entityId);boolean isMember = redisTemplate.opsForSet().isMember(entityLikeKey, userId);if (isMember) {else {public long findEntityLikeCount (int entityType, int entityId) {String entityLikeKey = RedisKeyUtil.getEntityLikeKey(entityType, entityId);return redisTemplate.opsForSet().size(entityLikeKey);public int findEntityLikeStatus (int userId, int entityType, int entityId) {String entityLikeKey = RedisKeyUtil.getEntityLikeKey(entityType, entityId);return redisTemplate.opsForSet().isMember(entityLikeKey, userId) ? 1 : 0 ;
表现层
表现层代码,异步请求,不要刷新整个页面,返回JSON字符串即可,加上注解@ResponseBody
1 2 3 4 5 6 7 8 9 10 11 12 13 14 15 16 17 18 19 20 21 22 23 24 25 26 27 28 29 30 31 @Controller public class LikeController {@Autowired private LikeService likeService;@Autowired private HostHolder hostHolder;@RequestMapping(path = "/like", method = RequestMethod.POST) @ResponseBody public String like (int entityType, int entityId) {User user = hostHolder.getUser();long likeCount = likeService.findEntityLikeCount(entityType, entityId);int likeStatus = likeService.findEntityLikeStatus(user.getId(), entityType, entityId);new HashMap <>();"likeCount" , likeCount);"likeStatus" , likeStatus);return CommunityUtil.getJSONString(0 , null , map);
在首页需要展示每条帖子赞的数量,更新表现层代码,HomeController
1 2 3 4 5 6 7 8 9 10 @RequestMapping(path = "/index", method = RequestMethod.GET) public String getIndexPage (Model model, Page page) {long likeCount = likeService.findEntityLikeCount(ENTITY_TYPE_POST, post.getId());"likeCount" , likeCount);
同理更新帖子详情页里的赞和评论的赞,DiscussPostController
1 2 3 4 5 6 7 8 9 10 11 12 13 14 public String getDiscussPost (@PathVariable("discussPostId") int discussPostId, Model model, Page page) {long likeCount = likeService.findEntityLikeCount(ENTITY_TYPE_POST, discussPostId);"likeCount" , likeCount);int likeStatus = hostHolder.getUser() == null ? 0 :"likeStatus" , likeStatus);
更新前端文件,登录不同测试账号测试点赞同一个帖子,主要观察redis数据库里的信息
2. 统计收到赞个数 社区的个人信息里会统计每个用户关注了多少人,被多少人关注,以及获得了多少个赞。本小节先完成最后一个功能。
统计每个用户收到的赞可以先统计用户发布了多少帖子、评论、恢复,但这样太麻烦,我们可以在点赞时额外以用户为key,再记录一下点赞数量,然后调用自增和自减来更改数量,这样更方便
因此本小节的内容为:
重构点赞功能
以用户为key,记录点赞数量
increment(key),decrement(key)
开发个人主页
首先添加生成用户key的方法,更新 RedisKeyUtil
1 2 3 4 5 6 private static final String PREFIX_USER_LIKE = "like:user" ;public static String getUserLikeKey (int userId) {return PREFIX_USER_LIKE + SPLIT + userId;
业务层
随后需要重构点赞业务代码,之前是只对某实体(帖子、评论、回复)点赞,现在加上该实体作者被点赞的数量,属于一次业务中执行两次更新的操作,需要用到Redis的编程事务管理 redisTemplate.execute(new SessionCallback(){ })。格外注意Redis的事务处理比较特殊,它不支持在事务内进行查询,Redis在执行事务过程中所提交的命令不是立刻执行,而是先提交到队列里,提交事务后统一执行。所以我们想要查询当前用户是否对这个实体点过赞,需要放在事务过程外查询
1 2 3 4 5 6 7 8 9 10 11 12 13 14 15 16 17 18 19 20 21 22 23 24 25 26 27 28 29 30 31 public void like (int userId, int entityType, int entityId, int entityUserId) {new SessionCallback () {@Override public Object execute (RedisOperations operations) throws DataAccessException {String entityLikeKey = RedisKeyUtil.getEntityLikeKey(entityType, entityId);String userLikeKey = RedisKeyUtil.getUserLikeKey(entityUserId);boolean isMember = operations.opsForSet().isMember(entityLikeKey, userId);if (isMember) {else {return operations.exec();
并且也注意到,之前的方法参数只有三个,分别是:int userId, int entityType, int entityId,根据这三个参数怎么去去获取实体的作者呢,这里的 userId 并不是作者,而是点赞的那个人。我们也不能凭借 entityId 去数据库里取,这样用 Redis 就没意义了,所以让该方法多传入一个参数,把实体的作者id也传进来 ,这个是很方便的,因为我们是在一个实体上点赞,传进来实体作者id很容易
表现层
LikeController里同步更新表现层方法,只用多传入一个 entityUserId
1 2 3 4 5 @RequestMapping(path = "/like", method = RequestMethod.POST) @ResponseBody public String like (int entityType, int entityId, int entityUserId) {
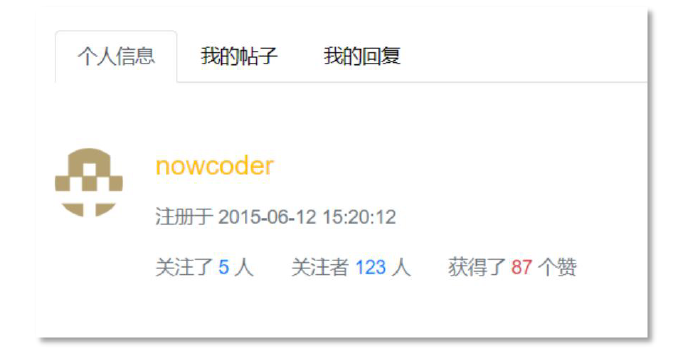
随后需要开发在个人主页里显示被多少人赞过,如下图:
可以直接在 UserController里建一个新方法
1 2 3 4 5 6 7 8 9 10 11 12 13 14 15 16 @RequestMapping(path = "/profile/{userId}", method = RequestMethod.GET) public String getProfilePage (@PathVariable("userId") int userId, Model model) {User user = userService.findUserById(userId);if (user == null ) {throw new RuntimeException ("该用户不存在!" );"user" , user);int likeCount = likeService.findUserLikeCount(userId);"likeCount" , likeCount);return "/site/profile" ;
根据视频更新前端代码,进行测试。对一个人点赞多次后,点他的头像进去,看他个人主页统计的赞的个数。再取消点赞,查看统计个数。同步观察Redis
3. 关注、取消关注 需求
开发关注、取消关注功能。
统计用户的关注数、粉丝数。
这个需求实现的关键在于区分谁是粉丝,谁是目标。若A关注了B,则A是B的Follower(粉丝),B是A的Followee(目标)。 关注的目标可以是用户、帖子、题目等,在实现时将这些目标抽象为实体。
这里定义 key 的方式非常重要,建议多理清楚几次。这里的value 都使用 SortedSet,把时间传进去作为 score,方便后面有排序的需求
某个用户关注哪些实体目标:followee:userId:entityType -> zset(entityId,now)
假设用户151关注了用户146、用户133、帖子131,假设用户entityType为1,帖子entityType为2,则语句为
followee:151:1 -> zset(146,now, 133,now),followee:151:2 -> zset(131,now)
某个实体拥有的粉丝:follower:entityType:entityId -> zset(userId,now)
用户146被用户151、用户150关注着,它拥有150、151这两个粉丝,语句为:
follower:1:146 -> zset(150,now, 151,now)
RedisKeyUtil.java
1 2 3 4 5 6 7 8 9 10 11 12 13 14 private static final String PREFIX_FOLLOWEE = "followee" ;private static final String PREFIX_FOLLOWER = "follower" ;public static String getFolloweeKey (int userId, int entityType) {return PREFIX_FOLLOWEE + SPLIT + userId + SPLIT + entityType;public static String getFollowerKey (int entityType, int entityId) {return PREFIX_FOLLOWER + SPLIT + entityType + SPLIT + entityId;
业务层
1 2 3 4 5 6 7 8 9 10 11 12 13 14 15 16 17 18 19 20 21 22 23 24 25 26 27 28 29 30 31 32 33 34 35 36 37 38 39 40 41 42 43 44 45 46 47 48 49 50 51 52 53 54 55 56 57 58 59 60 61 62 63 64 65 @Service public class FollowService {@Autowired private RedisTemplate redisTemplate;public void follow (int userId, int entityType, int entityId) {new SessionCallback () {@Override public Object execute (RedisOperations operations) throws DataAccessException {String followeeKey = RedisKeyUtil.getFolloweeKey(userId, entityType);String followerKey = RedisKeyUtil.getFollowerKey(entityType, entityId);return operations.exec();public void unfollow (int userId, int entityType, int entityId) {new SessionCallback () {@Override public Object execute (RedisOperations operations) throws DataAccessException {String followeeKey = RedisKeyUtil.getFolloweeKey(userId, entityType);String followerKey = RedisKeyUtil.getFollowerKey(entityType, entityId);return operations.exec();public long findFolloweeCount (int userId, int entityType) {String followeeKey = RedisKeyUtil.getFolloweeKey(userId, entityType);return redisTemplate.opsForZSet().zCard(followeeKey);public long findFollowerCount (int entityType, int entityId) {String followerKey = RedisKeyUtil.getFollowerKey(entityType, entityId);return redisTemplate.opsForZSet().zCard(followerKey);public boolean hasFollowed (int userId, int entityType, int entityId) {String followeeKey = RedisKeyUtil.getFolloweeKey(userId, entityType);return redisTemplate.opsForZSet().score(followeeKey, entityId) != null ;
表现层
1 2 3 4 5 6 7 8 9 10 11 12 13 14 15 16 17 18 19 20 21 22 23 24 25 26 27 28 29 30 31 32 @Controller public class FollowController {@Autowired private FollowService followService;@Autowired private HostHolder hostHolder;@RequestMapping(path = "/follow", method = RequestMethod.POST) @ResponseBody public String follow (int entityType, int entityId) {User user = hostHolder.getUser();return CommunityUtil.getJSONString(0 , "已关注!" );@RequestMapping(path = "/unfollow", method = RequestMethod.POST) @ResponseBody public String unfollow (int entityType, int entityId) {User user = hostHolder.getUser();return CommunityUtil.getJSONString(0 , "已取消关注!" );
更新 UserController,让个人主页显示关注数和粉丝数
1 2 3 4 5 6 7 8 9 10 11 12 13 14 15 16 17 18 19 20 21 22 23 24 25 26 27 28 29 @RequestMapping(path = "/profile/{userId}", method = RequestMethod.GET) public String getProfilePage (@PathVariable("userId") int userId, Model model) {User user = userService.findUserById(userId);if (user == null ) {throw new RuntimeException ("该用户不存在!" );"user" , user);int likeCount = likeService.findUserLikeCount(userId);"likeCount" , likeCount);long followeeCount = followService.findFolloweeCount(userId, ENTITY_TYPE_USER);"followeeCount" , followeeCount);long followerCount = followService.findFollowerCount(ENTITY_TYPE_USER, userId);"followerCount" , followerCount);boolean hasFollowed = false ;if (hostHolder.getUser() != null ) {"hasFollowed" , hasFollowed);return "/site/profile" ;
更新前端文件,完成测试
4. 关注列表、粉丝列表 业务层
查询某个用户关注的人,支持分页。
查询某个用户的粉丝,支持分页。
表现层
处理“查询关注的人”、“查询粉丝”请求。
编写“查询关注的人”、“查询粉丝”模板。
业务层:
1 2 3 4 5 6 7 8 9 10 11 12 13 14 15 16 17 18 19 20 21 22 23 24 25 26 27 28 29 30 31 32 33 34 35 36 37 38 39 40 41 42 43 44 public List<Map<String, Object>> findFollowees (int userId, int offset, int limit) {String followeeKey = RedisKeyUtil.getFolloweeKey(userId, ENTITY_TYPE_USER);1 );if (targetIds == null ) {return null ;new ArrayList <>();for (Integer targetId : targetIds) {new HashMap <>();User user = userService.findUserById(targetId);"user" , user);Double score = redisTemplate.opsForZSet().score(followeeKey, targetId);"followTime" , new Date (score.longValue()));return list;public List<Map<String, Object>> findFollowers (int userId, int offset, int limit) {String followerKey = RedisKeyUtil.getFollowerKey(ENTITY_TYPE_USER, userId);1 );if (targetIds == null ) {return null ;new ArrayList <>();for (Integer targetId : targetIds) {new HashMap <>();User user = userService.findUserById(targetId);"user" , user);Double score = redisTemplate.opsForZSet().score(followerKey, targetId);"followTime" , new Date (score.longValue()));return list;
表现层:
1 2 3 4 5 6 7 8 9 10 11 12 13 14 15 16 17 18 19 20 21 22 23 24 25 26 27 28 29 30 31 32 33 34 35 36 37 38 39 40 41 42 43 44 45 46 47 48 49 50 51 52 53 54 55 56 57 @RequestMapping(path = "/followees/{userId}", method = RequestMethod.GET) public String getFollowees (@PathVariable("userId") int userId, Page page, Model model) {User user = userService.findUserById(userId);if (user == null ) {throw new RuntimeException ("该用户不存在!" );"user" , user);5 );"/followees/" + userId);int ) followService.findFolloweeCount(userId, ENTITY_TYPE_USER));if (userList != null ) {for (Map<String, Object> map : userList) {User u = (User) map.get("user" );"hasFollowed" , hasFollowed(u.getId()));"users" , userList);return "/site/followee" ;@RequestMapping(path = "/followers/{userId}", method = RequestMethod.GET) public String getFollowers (@PathVariable("userId") int userId, Page page, Model model) {User user = userService.findUserById(userId);if (user == null ) {throw new RuntimeException ("该用户不存在!" );"user" , user);5 );"/followers/" + userId);int ) followService.findFollowerCount(ENTITY_TYPE_USER, userId));if (userList != null ) {for (Map<String, Object> map : userList) {User u = (User) map.get("user" );"hasFollowed" , hasFollowed(u.getId()));"users" , userList);return "/site/follower" ;private boolean hasFollowed (int userId) {if (hostHolder.getUser() == null ) {return false ;return followService.hasFollowed(hostHolder.getUser().getId(), ENTITY_TYPE_USER, userId);
更新前端代码,测试,查看关注列表和粉丝列表
5. 优化登录模块 需求
使用Redis存储验证码
验证码需要频繁的访问与刷新,对性能要求较高。
验证码不需永久保存,通常在很短的时间后就会失效。
分布式部署时,存在Session共享的问题。
使用Redis存储登录凭证
处理每次请求时,都要查询用户的登录凭证,访问的频率非常高。
使用Redis缓存用户信息
处理每次请求时,都要根据凭证查询用户信息,访问的频率非常高。
5.1 使用Redis存储验证码 首先要构造 Redis的key,因为要把验证码和当前登录的客户端绑定(注意不是和用户绑定,用户还没登录,没法绑定),之前是session来维护,因为验证码存到了session里,现在验证码存到redis了,我们可以给客户端临时生成一个凭证,然后通过 response 里的 cookie 发给客户端,这样客户端在请求的时候就能凭借此凭证和验证码进行校验。所以这里redis的key里包含了一个 owner。(做另外一个项目的时候,是用手机号登录,所以把手机号作为key去存验证码,那个流程是先输入手机号,再发送请求,服务端返回验证码。本项目是登陆页面一开始就加载了验证码,注意体会网页端和移动端登录时验证码的区别)
1 2 3 4 5 6 private static final String PREFIX_KAPTCHA = "kaptcha" ; public static String getKaptchaKey (String owner) {return PREFIX_KAPTCHA + SPLIT + owner;
业务层
业务层没有要更改的代码,因为业务层是生成验证码,本功能的重构不涉及到业务层
表现层
首先是生成验证码,并存到redis,注释掉之前 session 的代码
1 2 3 4 5 6 7 8 9 10 11 12 13 14 15 16 17 18 19 20 21 22 23 24 25 26 27 28 29 @RequestMapping(path = "/kaptcha", method = RequestMethod.GET) public void getKaptcha (HttpServletResponse response) {String text = kaptchaProducer.createText();BufferedImage image = kaptchaProducer.createImage(text);String kaptchaOwner = CommunityUtil.generateUUID(); Cookie cookie = new Cookie ("kaptchaOwner" , kaptchaOwner);60 ); String redisKey = RedisKeyUtil.getKaptchaKey(kaptchaOwner);60 , TimeUnit.SECONDS); "image/png" );try {OutputStream os = response.getOutputStream();"png" , os);catch (IOException e) {"响应验证码失败:" + e.getMessage());
然后是登录,要从redis里去验证码,而不是从session里
1 2 3 4 5 6 7 8 9 10 11 12 13 14 15 16 17 18 19 20 21 22 23 24 25 26 @RequestMapping(path = "/login", method = RequestMethod.POST) public String login (String username, String password, String code, boolean rememberme, Model model, HttpServletResponse response, @CookieValue("kaptchaOwner") String kaptchaOwner) {String kaptcha = null ;if (StringUtils.isNotBlank(kaptchaOwner)) { String redisKey = RedisKeyUtil.getKaptchaKey(kaptchaOwner);if (StringUtils.isBlank(kaptcha) || StringUtils.isBlank(code) || !kaptcha.equalsIgnoreCase(code)) {"codeMsg" , "验证码不正确!" );return "/site/login" ;
前端代码无需更新,检测能够登录成功,观看redis里的值和浏览器里的cookie
5.2 使用Redis存储登录凭证 之前是把 登陆凭证 放到 mysql 里,创建了一张表,存储了 user_id, ticket, 状态,过期时间。现在存到redis里,这张表及其对应方法就可以不用了,
之前是在 userService 里编写的相关方法,有三个地方:
登陆成功以后,生成登陆凭证并保存
退出时,把凭证删掉(其实是把状态设为1,表示失效,并不是真的删除)
查询凭证的方法
现在逐一重构这些方法
首先还是为 凭证 ticket 创建 redis 的 key
1 2 3 4 5 6 private static final String PREFIX_TICKET = "ticket" ;public static String getTicketKey (String ticket) {return PREFIX_TICKET + SPLIT + ticket;
随后为LoginTicketMapper 添加注解@Deprecated,表示不推荐使用。
业务层
对 UserService 做出更改,首先是登录的业务方法
1 2 3 4 5 6 7 8 9 10 11 12 13 14 15 16 17 public Map<String, Object> login (String username, String password, int expiredSeconds) {LoginTicket loginTicket = new LoginTicket ();0 ); new Date (System.currentTimeMillis() + (long )expiredSeconds * 1000 )); String redisKey = RedisKeyUtil.getTicketKey(loginTicket.getTicket());
其次是退出登录的方法(其实感觉这里 value 用 hash结构更好,可以直接改状态字段的值)
这里要注意,其实是把登陆凭证的状态设为1,表示失效,并不是真的删除,因为以后可能有需求比如一年登录了多少天,需要用到这些登陆凭证的信息
1 2 3 4 5 6 7 8 9 public void logout (String ticket) {String redisKey = RedisKeyUtil.getTicketKey(ticket);LoginTicket loginTicket = (LoginTicket) redisTemplate.opsForValue().get(redisKey);1 );
最后是查询用户登录凭证的方法
1 2 3 4 5 6 7 public LoginTicket findLoginTicket (String ticket) {String redisKey = RedisKeyUtil.getTicketKey(ticket);return (LoginTicket) redisTemplate.opsForValue().get(redisKey);
5.3 使用Redis缓存用户信息 处理每次请求时,都要根据凭证查询用户信息,访问的频率非常高。所以把它改为放到 redis 里。这里注意只是缓存,根本的还是用 user 表,只不过当前用户请求时,该用户信息会被频繁使用,所以将它缓存下来,提高性能。等这个用户不请求了,或者说登陆凭证失效了,就没必要留着这个缓存了。这个思路和之前的登录凭证是不同的,登陆凭证是一直留着,只是退出登录或者失效时,把状态改为1,注意体会这个区别
缓存的思路一般为:
查询用户信息时优先从缓存中取值,而不是去 mysql 里取值
取不到时,初始化缓存数据
数据变更时清除缓存数据(这里一般不会去更新缓存,而是直接删除,下一次查的时候再去初始化一下就行,更新数据比删除麻烦,而且容易导致并发的问题)
首先仍然是创建对应的 key
1 2 3 4 5 private static final String PREFIX_USER = "user" ; public static String getUserKey (int userId) {return PREFIX_USER + SPLIT + userId;
业务层
先是缓存思路三个步骤的方法
1 2 3 4 5 6 7 8 9 10 11 12 13 14 15 16 17 18 19 private User getCache (int userId) {String redisKey = RedisKeyUtil.getUserKey(userId);return (User) redisTemplate.opsForValue().get(redisKey);private User initCache (int userId) {User user = userMapper.selectById(userId);String redisKey = RedisKeyUtil.getUserKey(userId);3600 , TimeUnit.SECONDS); return user;private void clearCache (int userId) {String redisKey = RedisKeyUtil.getUserKey(userId);
然后更改需要 取用户信息、更新用户信息的其他方法
1 2 3 4 5 6 7 8 9 10 11 12 13 14 15 16 17 18 19 20 21 22 23 24 25 26 27 28 29 30 31 32 33 public User findUserById (int id) {User user = getCache(id);if (user == null ) {return user;public int activation (int userId, String code) {User user = userMapper.selectById(userId);if (user.getStatus() == 1 ) { return ACTIVATION_REPEAT;else if (user.getActivationCode().equals(code)) { 1 );return ACTIVATION_SUCCESS;else {return ACTIVATION_FAILURE; public int updateHeader (int userId, String headerUrl) {int rows = userMapper.updateHeader(userId, headerUrl);return rows;
表现层、前端不用更新,测试:
能否正常加载各个页面,加载每个页面时,会缓存用户信息。比如登陆后加载首页,会缓存首页发帖子几个用户的信息,看下一页时,又会多缓存几个用户信息
如果变更了用户信息,比如重新上传头像,则会先删除用户信息缓存,再次查询时则重新获取,这个不太好直观观察,可以打断点观察
本章节没有演示redis效率提高了多少,后面再演示
五、Kafka,构建TB级异步消息系统 Kafka是一个分布式的流媒体平台。应用:消息系统、日志收集、用户行为追踪、流式处理。特点:高吞吐量、消息持久化、高可靠性、高扩展性。
官网及下载网址:http://kafka.apache.org/
下载安装包解压即可,官网的安装包为windows、linux通用版本。
下载完成后首先更改配置文件:
Kafka是基于zookeeper的,首先更改其配置文件,位于kafka_2.13-3.2.0\config\zookeeper.properties
暂时只用改动 dataDir=d:/codework/data/zookeeper,原本的是linux系统下的目录。
随后更改kafka的配置文件,位于kafka_2.13-3.2.0\config\server.properties
暂时只用改动 log.dirs=d:/codework/data/kafka-logs,原本的是linux系统下的目录。
更改完成后,即可启动。
首先选到d盘,然后cd到d:\Environment\kafka_2.13-3.2.0,在此目录下先启动zookeeper,再启动kafka
命令分别为:(要按照配置文件启动)
bin\windows\zookeeper-server-start.bat config\zookeeper.properties
bin\windows\kafka-server-start.bat config\server.properties
启动之后,可以让springboot集成kafka
5.1 Spring整合Kafka测试 注意在此之前要保证使用命令行将zookeeper和kafka保持开启状态
导入依赖,在配置文件后追加
1 2 3 4 5 spring.kafka.bootstrap-servers =localhost:9092 spring.kafka.consumer.group-id =test-consumer-group spring.kafka.consumer.enable-auto-commit =true spring.kafka.consumer.auto-commit-interval =3000
其中spring.kafka.consumer.group-id的值一定要和kafka本地文件consumer.properties里保持相同,否则会启动失败
第一次用kafka,先测试保证正常启动且没有问题,再进行下一步的开发
1 2 3 4 5 6 7 8 9 10 11 12 13 14 15 16 17 18 19 20 21 22 23 24 25 26 27 28 29 30 31 32 33 34 35 36 37 38 39 40 41 @SpringBootTest public class KafkaTests {@Autowired private KafkaProducer kafkaProducer;@Test public void testKafka () {"test" , "你好" );"test" , "在吗" );try {1000 * 10 );catch (InterruptedException e) {@Component class KafkaProducer {@Autowired private KafkaTemplate kafkaTemplate;public void sendMessage (String topic, String content) {@Component class KafkaConsumer {@KafkaListener(topics = {"test"}) public void handleMessage (ConsumerRecord record) {
5.2 发送系统通知 当用户被别人点赞、关注,评论之后,系统应该发送一条消息去通知,我们把这三个操作抽象成事件
封装事件对象,entity-Event
1 2 3 4 5 6 7 8 9 10 11 12 13 14 15 16 17 18 19 20 21 22 23 24 25 26 27 28 29 30 31 32 33 34 35 36 37 38 39 40 41 42 43 44 45 46 47 48 49 50 51 52 53 54 55 56 57 58 59 60 61 62 63 64 65 66 public class Event {private String topic; private int userId;private int entityType;private int entityId;private int entityUserId; private Map<String, Object> data = new HashMap <>(); public String getTopic () {return topic;public Event setTopic (String topic) {this .topic = topic;return this ;public int getUserId () {return userId;public Event setUserId (int userId) {this .userId = userId;return this ;public int getEntityType () {return entityType;public Event setEntityType (int entityType) {this .entityType = entityType;return this ;public int getEntityId () {return entityId;public Event setEntityId (int entityId) {this .entityId = entityId;return this ;public int getEntityUserId () {return entityUserId;public Event setEntityUserId (int entityUserId) {this .entityUserId = entityUserId;return this ;public Map<String, Object> getData () {return data;public Event setData (String key, Object value) {this .data.put(key, value);return this ;
补充常量
1 2 3 4 5 6 7 8 9 10 11 12 13 14 15 16 17 18 19 String TOPIC_COMMENT = "comment" ;String TOPIC_LIKE = "like" ;String TOPIC_FOLLOW = "follow" ;int SYSTEM_USER_ID = 1 ;
编写事件的生产者和消费者,创建新的包event
生产者很简单,就是用kafka发送事件的消息。将事件发布到指定的主题,需要两个参数:发送的主题和发送的内容,这里的内容可以把整个event对象都转成JSON字符串发过去,至于怎么处理这个对象的信息,让消费者决定
1 2 3 4 5 6 7 8 9 10 11 12 13 14 @Component public class EventProducer {@Autowired private KafkaTemplate kafkaTemplate;public void fireEvent (Event event) {
消费者,看注释
1 2 3 4 5 6 7 8 9 10 11 12 13 14 15 16 17 18 19 20 21 22 23 24 25 26 27 28 29 30 31 32 33 34 35 36 37 38 39 40 41 42 43 44 45 46 47 48 @Slf4j @Component public class EventConsumer implements CommunityConstant {@Autowired private MessageService messageService;@KafkaListener(topics = {TOPIC_COMMENT, TOPIC_LIKE, TOPIC_FOLLOW}) public void handleCommentMessage (ConsumerRecord record) { if (record == null || record.value() == null ) {"消息的内容为空!" );return ;Event event = JSONObject.parseObject(record.value().toString(), Event.class);if (event == null ) {"消息格式错误!" );return ;Message message = new Message ();new Date ());new HashMap <>();"userId" , event.getUserId());"entityType" , event.getEntityType());"entityId" , event.getEntityId());if (!event.getData().isEmpty()) {for (Map.Entry<String, Object> entry : event.getData().entrySet()) {
生产者和消费者编写结束后,就是在什么时候去调用的问题了。其中消费者是被动触发的,这是kafka写好的,只要有生产者生产了消息,就会触发。所以我们主要考虑什么时候调用生产者。很明显,当用户点赞、评论、关注时,就应该调用。也就是LikeController、FollowController、CommentController
CommentController.java
1 2 3 4 5 6 7 8 9 10 11 12 13 14 15 16 17 18 19 20 21 22 23 24 25 26 27 28 29 30 31 32 33 34 35 36 37 38 39 40 41 42 43 44 45 46 47 @Controller @RequestMapping("/comment") public class CommentController implements CommunityConstant {@Autowired private CommentService commentService;@Autowired private HostHolder hostHolder;@Autowired private EventProducer eventProducer;@Autowired private DiscussPostService discussPostService;@RequestMapping(path = "/add/{discussPostId}", method = RequestMethod.POST) public String addComment (@PathVariable("discussPostId") int discussPostId, Comment comment) {if (hostHolder.getUser()==null ){return "redirect:/login" ;0 );new Date ());Event event = new Event ()"postId" , discussPostId); if (comment.getEntityType() == ENTITY_TYPE_POST) { DiscussPost target = discussPostService.findDiscussPostById(comment.getEntityId());else if (comment.getEntityType() == ENTITY_TYPE_COMMENT) { Comment target = commentService.findCommentById(comment.getEntityId());return "redirect:/discuss/detail/" + discussPostId;
LikeController.java
1 2 3 4 5 6 7 8 9 10 11 12 13 14 15 16 17 18 19 20 21 22 23 24 25 26 27 28 29 30 31 32 33 34 35 36 37 38 39 40 41 42 43 44 45 @Controller public class LikeController implements CommunityConstant {@Autowired private LikeService likeService;@Autowired private HostHolder hostHolder;@Autowired private EventProducer eventProducer;@RequestMapping(path = "/like", method = RequestMethod.POST) @ResponseBody public String like (int entityType, int entityId, int entityUserId, int postId) {User user = hostHolder.getUser();long likeCount = likeService.findEntityLikeCount(entityType, entityId);int likeStatus = likeService.findEntityLikeStatus(user.getId(), entityType, entityId);new HashMap <>();"likeCount" , likeCount);"likeStatus" , likeStatus);if (likeStatus == 1 ) {Event event = new Event ()"postId" , postId); return CommunityUtil.getJSONString(0 , null , map);
FollowController.java
1 2 3 4 5 6 7 8 9 10 11 12 13 14 15 16 17 18 @RequestMapping(path = "/follow", method = RequestMethod.POST) @ResponseBody public String follow (int entityType, int entityId) {User user = hostHolder.getUser();Event event = new Event ()return CommunityUtil.getJSONString(0 , "已关注!" );
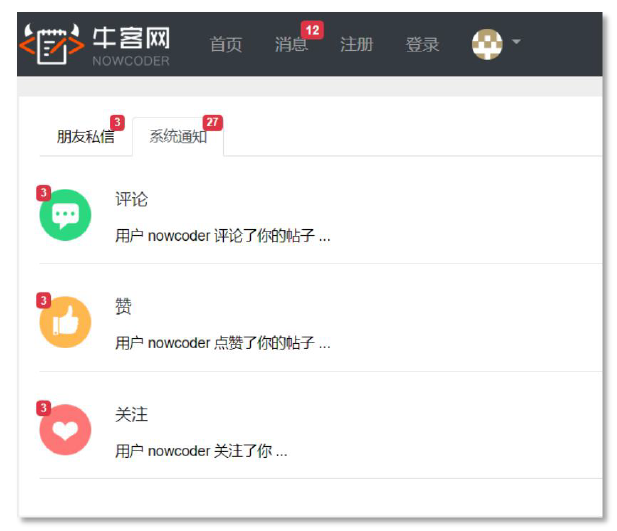
更新前端文件,进行测试,测试内容为点赞关注评论别人,去查看 message 表,看是否有新增记录
5.3 显示系统通知
通知列表
显示评论、点赞、关注三种类型的通知
通知详情
分页显示某一类主题所包含的通知
未读消息
这部分和kafka就没关系了,还是按照数据访问层-业务层-表现层进行开发。这里就不按照通知列表-通知详情的顺序来了,直接三层架构,每层把通知列表-通知详情都写好
DAO层
MessageMapper
1 2 3 4 5 6 7 8 9 10 11 12 13 14 @Mapper public interface MessageMapper {selectLatestNotice (int userId, String topic) ;int selectNoticeCount (int userId, String topic) ;int selectNoticeUnreadCount (int userId, String topic) ;selectNotices (int userId, String topic, int offset, int limit) ;
message-mapper.xml
1 2 3 4 5 6 7 8 9 10 11 12 13 14 15 16 17 18 19 20 21 22 23 24 25 26 27 28 29 30 31 32 33 34 35 36 37 38 39 40 <select id="selectLatestNotice" resultType="Message" >"selectFields" ></include>in ( select max(id) from message2 and from_id = 1 and to_id = #{userId}and conversation_id = #{topic}"selectNoticeCount" resultType="int" >count (id) from message2 and from_id = 1 and to_id = #{userId}and conversation_id = #{topic}"selectNoticeUnreadCount" resultType="int" >count (id) from messagewhere status = 0 and from_id = 1 and to_id = #{userId}if test="topic!=null" >and conversation_id = #{topic}if >"selectNotices" resultType="Message" >"selectFields" ></include>2 and from_id = 1 and to_id = #{userId}and conversation_id = #{topic}
业务层
MessageService
1 2 3 4 5 6 7 8 9 10 11 12 13 14 15 public Message findLatestNotice (int userId, String topic) {return messageMapper.selectLatestNotice(userId, topic);public int findNoticeCount (int userId, String topic) {return messageMapper.selectNoticeCount(userId, topic);public int findNoticeUnreadCount (int userId, String topic) {return messageMapper.selectNoticeUnreadCount(userId, topic);public List<Message> findNotices (int userId, String topic, int offset, int limit) {return messageMapper.selectNotices(userId, topic, offset, limit);
表现层
1 2 3 4 5 6 7 8 9 10 11 12 13 14 15 16 17 18 19 20 21 22 23 24 25 26 27 28 29 30 31 32 33 34 35 36 37 38 39 40 41 42 43 44 45 46 47 48 49 50 51 52 53 54 55 56 57 58 59 60 61 62 63 64 65 66 67 68 69 70 71 72 73 74 75 76 77 78 79 80 81 82 83 84 85 86 87 88 89 90 91 92 93 94 95 96 97 98 99 100 101 102 103 104 105 106 107 108 109 110 111 112 113 114 115 116 117 118 119 120 121 122 123 124 125 126 127 @Controller public class MessageController implements CommunityConstant {@RequestMapping(path = "/notice/list", method = RequestMethod.GET) public String getNoticeList (Model model) {User user = hostHolder.getUser();Message message = messageService.findLatestNotice(user.getId(), TOPIC_COMMENT);new HashMap <>();if (message != null ) {"message" , message);String content = HtmlUtils.htmlUnescape(message.getContent());"user" , userService.findUserById((Integer) data.get("userId" )));"entityType" , data.get("entityType" ));"entityId" , data.get("entityId" ));"postId" , data.get("postId" ));int count = messageService.findNoticeCount(user.getId(), TOPIC_COMMENT);"count" , count);int unread = messageService.findNoticeUnreadCount(user.getId(), TOPIC_COMMENT);"unread" , unread);"commentNotice" , messageVO);new HashMap <>();if (message != null ) {"message" , message);String content = HtmlUtils.htmlUnescape(message.getContent());"user" , userService.findUserById((Integer) data.get("userId" )));"entityType" , data.get("entityType" ));"entityId" , data.get("entityId" ));"postId" , data.get("postId" ));int count = messageService.findNoticeCount(user.getId(), TOPIC_LIKE);"count" , count);int unread = messageService.findNoticeUnreadCount(user.getId(), TOPIC_LIKE);"unread" , unread);"likeNotice" , messageVO);new HashMap <>();if (message != null ) {"message" , message);String content = HtmlUtils.htmlUnescape(message.getContent());"user" , userService.findUserById((Integer) data.get("userId" )));"entityType" , data.get("entityType" ));"entityId" , data.get("entityId" ));int count = messageService.findNoticeCount(user.getId(), TOPIC_FOLLOW);"count" , count);int unread = messageService.findNoticeUnreadCount(user.getId(), TOPIC_FOLLOW);"unread" , unread);"followNotice" , messageVO);int letterUnreadCount = messageService.findLetterUnreadCount(user.getId(), null );"letterUnreadCount" , letterUnreadCount);int noticeUnreadCount = messageService.findNoticeUnreadCount(user.getId(), null );"noticeUnreadCount" , noticeUnreadCount);return "/site/notice" ;@RequestMapping(path = "/notice/detail/{topic}", method = RequestMethod.GET) public String getNoticeDetail (@PathVariable("topic") String topic, Page page, Model model) {User user = hostHolder.getUser();5 );"/notice/detail/" + topic);new ArrayList <>();if (noticeList != null ) {for (Message notice : noticeList) {new HashMap <>();"notice" , notice);String content = HtmlUtils.htmlUnescape(notice.getContent());"user" , userService.findUserById((Integer) data.get("userId" )));"entityType" , data.get("entityType" ));"entityId" , data.get("entityId" ));"postId" , data.get("postId" ));"fromUser" , userService.findUserById(notice.getFromId()));"notices" , noticeVoList);if (!ids.isEmpty()) {return "/site/notice-detail" ;
在页面头部显示所有的未读消息数量,由于是在首页,所以所有请求访问时,都要查,此处我们写在拦截器里,去新建一个拦截器
1 2 3 4 5 6 7 8 9 10 11 12 13 14 15 16 17 18 19 @Component public class MessageInterceptor implements HandlerInterceptor {@Autowired private HostHolder hostHolder;@Autowired private MessageService messageService;@Override public void postHandle (HttpServletRequest request, HttpServletResponse response, Object handler, ModelAndView modelAndView) throws Exception {User user = hostHolder.getUser();if (user != null && modelAndView != null ) {int letterUnreadCount = messageService.findLetterUnreadCount(user.getId(), null );int noticeUnreadCount = messageService.findNoticeUnreadCount(user.getId(), null );"allUnreadCount" , letterUnreadCount + noticeUnreadCount);
更新前端文件,测试。这部分视频和资料里的代码里有bug,在视频课程下面评论区有勘误,我的代码已经改正
六、Elasticsearch,分布式搜索引擎
